How to remove a shadow from a face in photoshop – Clone Stamp Tool
Though the primary purpose of clone stamp too is to create a duplicate any portion, you can use the tool to remove shadow. In photoshop, this a handy option that allows you to copy from a sample and blend the copied sample in your desired position.
The entire process is seamless. But you must have the right know-how about the cloning process and how it effectively works. Mere duplication of the shadow is not the right way.
Check the simplest steps below and remove the shadows at once.
When need to remove shadow
You know, the pictures of shadow help the object to look realistic. In fact, the shadows help the object be more professional when used in promotions.
But at times, it could be an ugly shadow. And in that case, the removal of the shadow either from the face or from the object is a must. Otherwise, the photo will lose the appeal. It may fail to grab attention of your intended audiences.
Moreover, the dark shadows images make the photos repulsive. So, when you apply the shadow on the image, instead of making the photo impressive, the look backfires. This is the other reason why you need to remove the shadow.
Further, shadow effect on pictures add some visual cues on the object. So, when you look at the object first, they make a vivid impression. However, when the shadows are imperfect, it can make the overall image look disastrous. Instead of beautification, the photos get a negative effect.
For the aforesaid reasons, photo of a shadow needs to be removed.
Clone Stamp is the best method to remove shadow from face in Photoshop. Check this brief guide.
How to remove a shadow from a face in photoshop – Clone Stamp Tool
Step -1 : Image opening
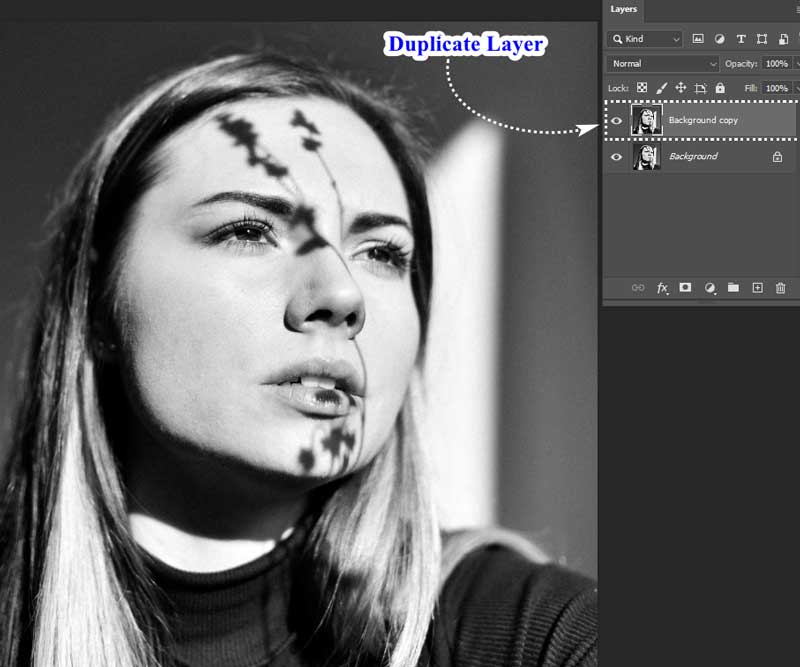
First of all, open the photo in Photoshop to apply clone stamp tool photoshop. Next, right-click on the background layer Select the Duplicate Layer. Also, you can apply the shortcut (Ctrl + J) to create a copy of the background layer.

Step -2 : Get the Clone Stamp
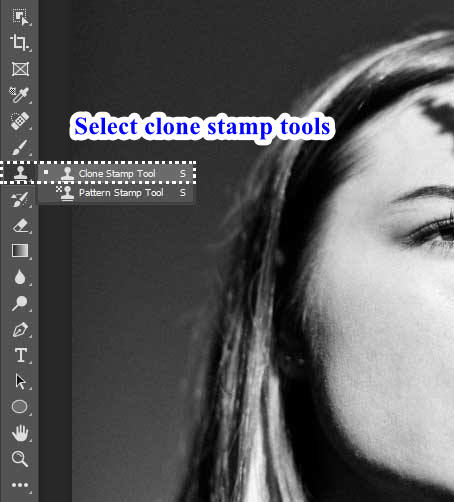
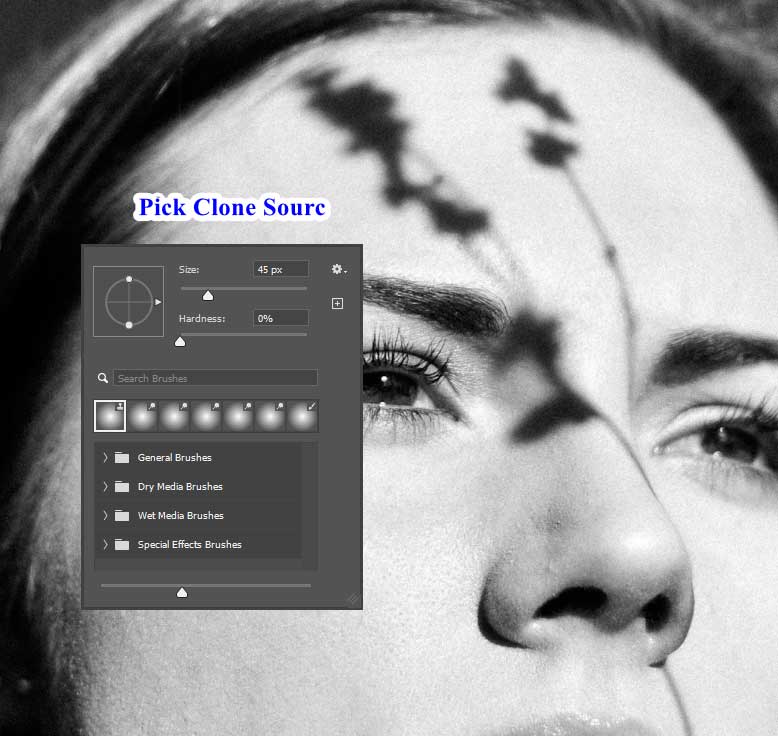
Check your toolbar on the left. Then, select the clone stamp tool photoshop. For the best result, choose a soft, medium-sized brush. Because blending gets smoother with the smooth edges.
Additionally, you can adjust the brush size using the bracket keys: “[” to decrease and “]” to increase the size. If you are aiming to reduce rather than completely remove shadows from photo, set the Clone Stamp tool’s opacity to around 50 percent.

Step -3 : Pick Clone Source
In your image, identify a non-shaded area of the face or the object. Press Alt and click to select your source pixels. The cursor will change to crosshairs. It indicates that the source has been selected.

Step -4 : Remove shadow from face
Zoom: Zoom in on the shadowed area you want to work on.
Clone: Take the clone stamp. Now, start painting over the shadow with the stamp. You may have to repeat Steps 3 and 4 several times. Selecting new source pixels that closely match the content and color of the area you are editing.

Undo: When you are not happy with the outcome, you may need to undo. To undo your action, simply you can press Ctrl and Z keys together. Also, you do it by going to Edit and then by clicking on the Undo Clone Stamp option.
For the best results, use different clone sources to cover the shadow. It will ensure the natural look of the shadow. If it appears unnatural, select pixels from another part of the photo. Then paint again.
Additionally, you can also use the Healing Brush tool. Usually, this tool is applied for further refinement. Avoid repeating patterns. It could indicate that cloning has been used to remove an object or shadow from the photo
Conclusion:-
You are in the last part of this brief guide on person shadow image. Follow the steps mentioned above. Check the results and share it with us using the comment section.
However, if still you are unable to remove shadow from face using Photoshop, share your problem with us. Our experts will extend their support in removing the shadows.


Recent Comments