Last reviewed against current Adobe Photoshop help documentation. This guide focuses on real failure states we see most often: wrong layer order, unsuitable base layers, clipped adjustments, grouped layers, and export confusion.
Quick Answer: Why a Clipping Mask Fails in Photoshop
So your photoshop clipping mask not working again? Take a breath.
Most failures come down to four things. The base layer sits in the wrong spot. The clipped layer is empty or hidden. The menu is grayed out from a locked layer. Or your export flattens everything into mush.
Clipping mask not working photoshop issues are almost always a layer or visibility problem. Not a Photoshop bug. We’ve cleaned up thousands of mask jobs over 12 years, and the same five mistakes keep showing up.
What Usually Breaks First
Why is clipping mask not working in photoshop most of the time? Layer order.
The clipped layer must sit directly above the base. One slip and the whole stack snaps. Clipping mask in photoshop not working also tracks back to invisible base layers or bases with zero pixels. If the base shows nothing, your mask shows nothing too.
Locked layers, smart object weirdness, and export confusion fill out the list. Sound familiar?
How to Diagnose the Issue in 30 Seconds
Why is my clipping mask not working photoshop? Run this fast check.
- Is the clipped layer right above the base layer?
- Is the base layer visible (eye icon on)?
- Does the base layer have actual pixels or shape data?
- Are both layers unlocked?
- Is fill and opacity at a normal value?
If you said “no” to one, that’s your fix. Clipping masking not working in photoshop usually quits the moment you correct that single item. There’s a Bengali proverb that fits here: small holes sink big boats. Same logic applies to layers.

What a Clipping Mask Needs Before It Can Work
A clipping mask photoshop setup needs three things working together. Get any one wrong and the result breaks.
Think of it like a stencil and a spray can. The base layer is the stencil. The clipped layer above is the paint. Take the stencil away or flip the order, and you spray on nothing.
Correct Layer Order
How to clip layers in photoshop starts with stacking. The clipped layer goes on top. The base layer goes right below.
Photoshop clipping mask logic always reads downward. The base controls what shows. The layer above gets clipped to the base’s shape.

A Visible Base Layer
Clip mask in photoshop fails fast if the base is hidden. Click the eye icon so the base is visible. Also check the base actually has pixels. An empty layer reveals nothing.
A blank shape or a transparent layer counts as nothing too.

Pixels, Text, or Vector Content on the Clipped Layer
Ps clipping mask works on real content. The clipped layer needs pixels, text, a shape, or a smart object.
Empty layers cannot be clipped to anything. Drag in your image first. Then add the clipping mask on photoshop.
Check Layer Order Before You Do Anything Else
Before you click anything else, check the stack. Layer order beats every other fix.
Most “broken” masks fix themselves when the order is right. Drag the layer up. Try again. Done.

Why the Clipped Layer Must Sit Above
How to clip mask in photoshop depends on a simple rule. The base layer reveals the clipped layer above it.
If the clipped layer sits below the base, Photoshop has nothing to clip. The mask gives no error. It just shows nothing. How to clip a layer in photoshop fails silently when the order is wrong.
How to Reorder Layers Safely
To create clip mask photoshop output cleanly, reorder layers like this.
- Open the Layers panel.
- Drag the layer you want clipped so it sits above the base.
- Right-click the top layer.
- Choose Create Clipping Mask.
Or use the shortcut: Alt+Ctrl+G on Windows, Opt+Cmd+G on Mac. To add clipping mask photoshop without dragging, hold Alt and click between the two layers in the panel.
Fix “Create Clipping Mask” When It Is Unavailable or Grayed Out
Create clipping mask greyed out? Can’t create clipping mask photoshop at all? The menu is telling you something. Photoshop is blocking the action because one condition isn’t met.
Create clipping mask photoshop not working ties to four causes most of the time. Locked layers, background-layer limits, group confusion, or wrong selection.
Locked Layers
A locked layer cannot be clipped. Photoshop create clipping mask not working often comes from a tiny lock icon you missed.
Look at the Layers panel. See a small padlock? Click it once to unlock the layer. The clipping mask photoshop shortcut works the moment the layer unlocks. Photoshop clipping mask shortcut won’t fight a locked layer.
Background Layer Limits
You can’t clip to a Background layer. The Background layer sits in a special locked state. Photoshop blocks masks on it.
Double-click the Background layer in the panel. Rename it (just press OK). Now it becomes a regular layer. The clipping mask shortcut photoshop will work fine after that.
This one trips up most beginners, every single day.
Selection and Group Confusion
If you have multiple layers selected, Photoshop gets confused. Photoshop clip mask shortcut needs only one layer selected.
Click on the single layer you want to clip. Then run the shortcut for clipping mask in photoshop: Alt+Ctrl+G or Opt+Cmd+G.
If you accidentally selected a group folder, Photoshop may also gray out the option. Open the group. Click on the layer inside. Then run the clipping mask shortcut. Clipping mask shortcut not working? It’s almost always one of these three things.
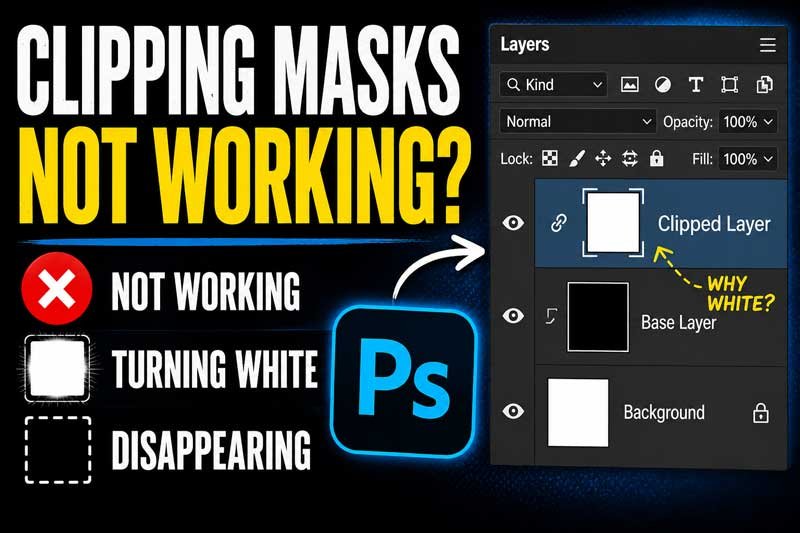
Why the Result Turns White, Blank, or Looks Wrong
Clipping mask turning white feels like the worst kind of bug. You did everything right. The mask still looks like a fresh sheet of paper.
Don’t panic. Photoshop clipping mask not working here usually means a setting got knocked, not the mask itself.

Fill and Opacity Problems
Open the Layers panel. Check Fill and Opacity on the clipped layer. If either reads 0%, your layer is invisible.
Slide both back to 100%. Clipping mask not working photoshop fixes itself when fill comes back. Same for the base layer. If the base sits at 0% fill, the clipped content has nothing to attach to visually.
Blend Mode Conflicts
Some blend modes wipe content out. If the base or the clipped layer uses a strong blend mode, results can turn white or invisible.
Set the blend mode back to Normal on both layers. Clipping mask not working in photoshop often returns to normal the second you reset this. Add fancy blend modes only after the mask works clean.
White Shape or White Background Confusion
This one’s sneaky. Clipping mask in photoshop not working with shapes? You may have a white shape over a white canvas.
Blank clipping mask photoshop output sometimes means the mask is fine. The colors just match. Add a colored background layer below the base. Now you’ll see if the mask actually works.
Clipping mask not working in photoshop on rectangle shapes follows the same rule. Check colors, not just the mask.
Why Clipped Content Disappears After You Make the Mask
Clipping mask disappearing photoshop output? Your mask probably worked. The content just moved out of view.
Why is clipping mask not working in photoshop here is the wrong question. The mask is fine. Visibility is the issue.
Off-Canvas Content
Clipping mask in photoshop not working sometimes means the clipped content slid off the canvas.
Press Ctrl+T (or Cmd+T) on the clipped layer. You’ll see the bounding box. If the box sits outside the canvas, drag it back in. Use Edit > Free Transform to scale it down to fit.
Hidden Base Layers
Why is my clipping mask not working photoshop after you toggled visibility? Check the base layer’s eye icon.
A hidden base layer makes the clipped content vanish. Click the eye icon back on. Boom, content returns.

Tiny Mask Areas and Transforms
If the base layer is a tiny dot, the clipped layer shows only that tiny dot’s worth of content. Clipping masking in photoshop respects exact base shape, every time.
Scale the base layer up with Free Transform. Or replace it with a bigger shape. The clipped result follows the base’s footprint, no exceptions.
How Text, Shapes, and Smart Objects Break Clipping Masks Differently
Different layer types behave differently. Clipping mask in photoshop rules don’t change, but the symptoms do.
This is where most users get stuck. Photoshop clipping mask works on all of these. The fix path is just different for each.

Text Layer Issues
Clip text layers like any other layer. The text shape acts as the base.
Common mistake? Putting text above the image. Text should sit below the image. The image then clips to the text shape. Clipping mask photoshop with text follows the same rule as everything else: clipped layer on top, base below.
If text disappears, check rasterization. A rasterized text layer behaves like pixels. An editable text layer keeps vector edges sharp.
Shape Layer Issues
Clipping mask in photoshop not working with shapes usually means the shape has no fill. Check the shape’s fill color in the Properties panel.
A shape with “no fill” works as a base, but only the visible stroke shows. Clipping mask not working in photoshop on rectangle shapes? Same fix. Add a fill. Even white works, as long as it’s not “none.”
Smart Object Issues
Smart objects can be clipped. They can also act as a base.
Ps clipping mask on a smart object sometimes shows weird preview lag. That’s just Photoshop rendering. Wait a second. Or rasterize the smart object if you don’t need its non-destructive features. Right-click the layer and pick Rasterize Layer.
Smart objects with effects applied (drop shadow, glow) can also confuse the mask preview. Turn the effects off briefly to confirm the mask works.
Problems with Multiple Layers and Groups
Group clipping mask photoshop work gets messy fast. One wrong click and the whole stack falls apart.
Clipping mask on photoshop with groups follows the same base-layer rule. The trick is knowing what counts as the base.
Clipping to One Layer vs a Group
How to clip layers in photoshop with groups? You have two options.
Option one: clip each layer individually to the base. Option two: put your clipped layers inside a group, then clip the group’s blend mode through the base. Both work for clip masking in photoshop, but they look different.
For clean results, clip the group to the base by setting the group’s blend mode to “Pass Through.” Then make sure the base layer sits right below the group.
Nested Groups and Order Mistakes
Clipping mask in photoshop not working with nested groups? Photoshop reads groups top-down inside their parent.
If your base sits outside the group, the clipped layers inside the group may not see it. Move the clipped layers into the same group as the base, or pull the base out. One of those will fix the failure.
How to Isolate the Broken Layer
Best way to fix a broken stack? Isolate the problem.
Hide every layer except your base and the layer you want clipped. Try create clip mask photoshop again. If it works, add layers back one by one until it breaks. The layer you just added is your villain.
This sounds tedious. It saves hours over guessing.
Adjustment Layers Can Make the Mask Look Broken When It Is Not
Sometimes the mask is fine. The adjustment layer is lying about it.
Photoshop clipping mask not working with color shifts? Stop blaming the mask.

Clipped Adjustments
Clipping mask photoshop not working when an adjustment layer sits above? You probably forgot to clip the adjustment too.
A clipped adjustment layer affects only the layer right below it. If it’s not clipped, it affects every layer below. To clip an adjustment, select it. Then run Alt+Ctrl+G (Win) or Opt+Cmd+G (Mac).

Unexpected Color Changes
Clipping mask not working photoshop with color shifts means an adjustment is bleeding past your target. The mask itself is doing fine. The Hue/Saturation or Curves layer is the loud guest at the party.
Click the adjustment. Clip it to the layer below. Colors snap back into place.
Resetting Non-Destructive Edits
If color or tone still looks off, reset the adjustment.
Open the adjustment’s Properties panel. Click the small reset arrow at the bottom. This wipes the adjustment back to default without deleting the layer. Clipping masking in photoshop returns to clean output once the adjustment behaves.
Export and Background Problems That Look Like Clipping Mask Errors
Export clipping mask photoshop sometimes shows results that scream “broken mask.” The PSD looks perfect. The exported file looks wrong.
Photoshop clipping mask not working at export time is rarely the mask. It’s the format settings.

Transparent PNG Confusion
Clipping mask in photoshop not working when exported as PNG? Check transparency settings.
Use File > Export > Quick Export as PNG. Make sure the canvas behind your masked artwork is transparent. If the bottom of your stack has a solid color layer, that color exports too. PNG keeps transparency. JPG does not.

JPEG Flattening Issues
Clipping mask not working in photoshop when saved as JPG? JPG flattens everything onto a white background.
Your clean transparent mask becomes a mask on a white square. The mask still worked. The format just killed the transparency. Export as PNG for transparency. Export as JPG only when you want a solid background.
Preview vs Exported File Differences
Clipping mask photoshop not working in the exported file but fine in the editor?
Open File > Export > Export As. Check that “Transparent Background” is on for PNG. Check that no color profile is forcing a flatten. Compare the export preview to your canvas. If they don’t match, the export setting is the problem. Not the mask.
A Clean Workflow That Prevents Clipping Mask Errors
Prevention beats troubleshooting. Clipping mask photoshop errors fall by 80% when you set up the file right from the start.
This is the workflow we use on production jobs every day at Clipping Photo Experts. Want fewer headaches? Build them out from day one.

Name Your Layers
Photoshop clipping mask trouble shrinks fast when layers have real names. “Layer 1” and “Layer 5” tell you nothing.
Rename to “BASE – product shape,” “CLIP – hero image,” “ADJ – hue shift.” Now the stack reads itself. Spotting a wrong order takes seconds.
Use Groups with Intention
Ps clipping mask work gets cleaner with smart groups. Put each masked element in its own group.
Each group should hold: the base layer, the clipped content, and any clipped adjustments. Now you can hide the whole group, duplicate it, or move it anywhere. Clipping mask on photoshop becomes modular.
Check Before Exporting
Before you export, do a 10-second check.
- Are all clipped layers above their bases?
- Are bases visible?
- Are blend modes set right?
- Is the canvas the right size?
- Is the format right (PNG for transparent, JPG for solid)?
How to clip a layer in photoshop is the easy part. Checking before export saves the actual job.
When You Should Use a Layer Mask or Vector Mask Instead
Sometimes a clip mask in photoshop isn’t the right tool. Clipping mask in photoshop locks the clipped layer to the exact base shape. That’s great for hard edges. Less great for soft fades or scalable graphics.
Why fight the wrong tool when there’s a better one sitting right there?
Soft Edges and Transparency
Need feathered edges, smooth fades, or partial opacity? How to clip mask in photoshop won’t give you that. Use a layer mask instead.
Layer masks paint with black and white. Black hides. White shows. Gray makes partial transparency. That’s something a clipping mask just can’t do.
Scalable Shape Edges
Clipping mask in photoshop not working with shapes you plan to scale? Use a vector mask instead.
Vector masks stay sharp at any size. Clipping masks tied to raster shapes go fuzzy when you scale them up. For logos and icons that get resized often, vector masks win.
Decision Guide by Job Type
How to clip layers in photoshop becomes a question of which mask fits the job. Quick guide:
- Clipping mask: image inside a defined shape, text, or solid silhouette
- Layer mask: soft fades, brushed transitions, complex selections
- Vector mask: scalable edges, crisp logos, geometric shapes
Pick the right tool and your file behaves. Pick the wrong one and you’ll be back here troubleshooting.
When to Stop Fighting and Outsource the Job
Real talk. Some images aren’t worth the time fight.
Hair flying in the wind. Glass with reflections. Fur. Fabric layered over fabric. Wedding dresses. Product shoots with shadows that need to stay realistic.
These eat hours and still look off. If the mask still fails on hair, fabric, glass, shadows, or layered composites, it’s usually faster to outsource. Our team handles bulk product shots, editorial cutouts, and tricky e-commerce edges every single day.
We provide hand-drawn clipping paths and high quality photo editing services. Upload two or three images as a free trial. We will do tests within 45 minutes or less. Need a second opinion before you commit? That’s the fastest way to see if we’re a fit.
Frequently Asked Questions
Why is My Clipping Mask All White?
Photoshop clipping mask not working with a white-only result? Check three things fast.
First, fill and opacity on both layers. Both should be 100%. Second, blend modes. Reset both to Normal. Third, the canvas color. A white shape over a white background looks blank. Add a colored background layer to test.
If all three pass and it’s still white, the clipped layer probably has no actual content.
Why Can't I Clip to a Background Layer?
Create clipping mask photoshop not working when you try to clip to the Background layer? That’s by design.
The Background layer is locked into a special state. Photoshop won’t let you clip to it. Double-click the Background layer in the Layers panel. Rename it (default “Layer 0” works fine). It becomes a regular layer. Now the clipping mask works.
Why Does My Clipping Mask Shortcut Not Work?
Clipping mask shortcut not working can mean three things. The wrong layer is selected. Multiple layers are selected. Or a custom keyboard shortcut overrode the default.
Reset to default in Edit > Keyboard Shortcuts. Make sure only one layer is selected when you press Alt+Ctrl+G (Win) or Opt+Cmd+G (Mac).
Why Does the Export Look Different from the PSD?
Export confusion is real. PSD preserves layers and transparency. JPG flattens everything onto white. PNG keeps transparency.
Export as PNG when you need a transparent background. Export as JPG only for solid backgrounds. Photoshop create clipping mask not working at export usually means the format is fighting your transparency.
When Should I Outsource Difficult Masking?
Photoshop create clipping mask not working after 30 minutes of trying? You’re paying yourself a bad hourly rate. You can outsource difficult masking to save your time.
Send the file to us. We complete 3 to 4 thousand images for clipping tasks in 24 hours. Email sales@clippingphotoexperts.com or call +88 01981-449221. Upload two or three images as a free trial first. We’ll send back tests in 45 minutes or less.
Clean edges. No fighting Photoshop. That’s the deal.
Need Clean Edges Without Fighting Photoshop?
You impress your customers and improve sales conversion rates with images that look right the first time. Tough cutouts shouldn’t slow that down.
Send your images. Get tests back in 45 minutes. Get the full job back in 24 hours.
📞 +88 01981-449221 📧 sales@clippingphotoexperts.com

Shahidul Islam
Founder & Managing Director at Clipping Photo Experts
Helping photographers, brands, and ecommerce businesses create stunning visuals through professional photo editing, image masking, retouching, and post-production services. Passionate about sharing practical Photoshop and photography insights based on real-world experience.