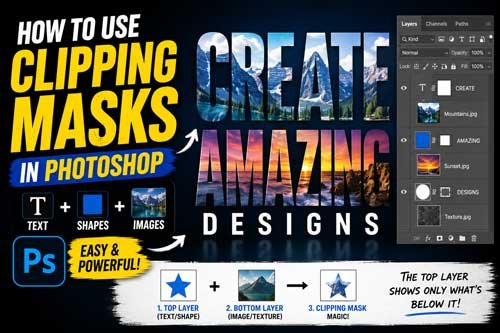
Clipping masks look fancy. But they’re easy once you try. You stack one layer on top of another. The bottom layer decides what shows. Think of it like a cookie cutter pressed into dough.
This guide skips the theory dump. We’ll cover three real workflows: putting images inside text, clipping images to shapes, and image-on-image composites. You’ll also learn Smart Object tricks, export tips, and quick fixes for common mess-ups in 2026.
By the end, you’ll know how to use clipping mask in Photoshop for text effects, shape frames, and image-based layouts.
When a Clipping Mask Is the Right Tool
What is a clipping mask in Photoshop? It’s a way to make one layer’s shape control what the layer above it shows. Per Adobe, the base layer controls visibility. Clipped layers above must sit as successive layers in the panel.
Why bother with a clipping mask in photoshop instead of erasing? Because erasing is permanent. Clipping is editable. You can swap, scale, and recolor anytime.

Text Effects
The text clipping mask photoshop trick is the most popular use. You type a word. You clip a photo into it. Headlines look magazine-grade in seconds.

Shape-Based Framing
A shape mask in photoshop is great for circles, rectangles, and custom badges. Catalog blocks and frames love this method. Quick layout, no fuss.

Image-in-Image Layouts
Clipping mask ideas get creative when you put one picture inside another. Think silhouettes, posters, and overlays. Photo masking in photoshop opens up moody, layered designs.
Want a deeper primer? Read our what is a clipping mask guide.
The Layer Setup You Need Before Clipping Anything
Before you create clipping mask in photoshop, your layers need order. Get this wrong and nothing works.

Bottom Layer as the Container
Your bottom layer is the shape. Text, a vector shape, or any non-transparent layer. This is what controls the visible area.
Top Layer as the Content
Your top layer is the photo or fill. To clip a layer in photoshop, put the content directly above the container. Right-click and choose Create Clipping Mask. Or hit Alt+Ctrl+G on Windows, Option+Cmd+G on Mac.
Naming Layers Before You Start
Slow knife cuts the cleanest. Spend ten seconds naming layers. “Text-Container” and “Photo-Fill” beat “Layer 1” and “Layer 5” when you come back tomorrow.
For the basic setup, see how to make a clipping mask in Photoshop.
How to Clip an Image Inside Text in Photoshop
This is the headline use case. The text clipping mask photoshop effect is everywhere on social, posters, and merch.

Choosing the Right Font Weight
Use bold or extra-bold fonts. Thin fonts kill the photo behind them. The wider the letters, the more image you see. Skinny letters? You barely see anything.

Placing and Scaling the Image
Type your word with the Type Tool. Place your image directly above the text layer. Adobe notes Photoshop type stays vector-based, so it scales clean.
Now make a text clipping mask. Right-click the photo layer and pick Create Clipping Mask. Boom. Image into text photoshop done.
Move the photo around inside the letters with the Move Tool. Want a different crop? Just drag. Need to scale? Free Transform on the photo, never the text.
Making the Effect Readable
A pretty effect is useless if no one can read it. Crop the photo so a busy area sits behind big letters. Pick a section with strong contrast. Avoid skin tones behind cream-colored words. Ever tried fitting a sunset photo neatly inside the word SUMMER and ending up with one orange smear?
Best Practices for Text Clipping Masks That Still Look Readable
Clipping mask text effect in photoshop fails when style beats clarity. These rules fix that.
Contrast and Color Choices
Dark fonts need bright photos. Light fonts need dark photos. To change color of text clipping mask photoshop, drop a Hue/Saturation adjustment layer above and clip it to the photo. Editable. Non-destructive.
Spacing and Line Breaks
Tight letter spacing leaks the photo. Wide spacing lets it breathe. Adjust text after clipping mask photoshop by clicking the Type layer again. Tracking and leading still work.
Break long headlines into two lines. Big block of text reads better than a thin stretched word.
When to Add Overlays or Strokes
Add a thin stroke if letters blur into the background. Or stack a soft color overlay above the photo and clip it. Photoshop text clipping mask with text stroke on saves outdoor poster designs that look messy on phones.
Need this done at scale across products? Pro product photo editing handles bulk work fast.
How to Clip an Image to a Shape Layer
Shape clipping mask photoshop is the workhorse for catalog modules and Instagram tiles.

Circles, Rectangles, and Custom Shapes
Grab the Shape Tool. Draw a circle. Hold Shift to keep it round. Adobe’s shape guide supports this in any recent build.
Drop your photo above the shape. Right-click. Create Clipping Mask. The image now lives inside that circle.
Custom shapes work the same way. Photoshop mask with shape isn’t picky. Stars, badges, hexagons, all fine.

Editing the Shape Without Breaking the Mask
Here’s the magic. The shape stays editable. Change fill, stroke, corner radius, or scale anytime. The clipped photo follows.
Want to clip image to a shape in Photoshop without losing edits? Keep the shape as a vector layer. Don’t rasterize it.
Using Clipping Masks With Product Photos and Mockups
Clipping mask images is huge for ecommerce in 2026. Baymard found 56% of users’ first action on product pages was exploring images. Bad product visuals lose sales fast.
Packaging Mockups
Drop your label artwork above a packaging mockup base. Clip it to the printable area. Photoshop photo mask keeps the curve, lighting, and shadows realistic.
Social Graphics
Clip product shots into branded shape modules. Picture mask photoshop makes Instagram grids feel cohesive without redesigning each post.
Catalog Blocks
How do you mask an image in photoshop for a catalog page? Build one shape grid. Clip every product into its slot. Swap photos as new SKUs land.
Baymard also found 42% of users try to gauge size from product images. So presentation matters.
How to Use One Image Over Another Image With a Clipping Mask
Clipping in photoshop gets artistic when both layers are images. This is composite territory.
Photo Inside Silhouette
Cut a silhouette from one image. Use it as your container. Photo masking in photoshop fills that silhouette with another photo. Posters, album covers, brand campaigns. All built like this.
Creative Crop Overlays
Drop a textured photo above a portrait. Clip the texture. The skin keeps its detail with a moody overlay. Subtle, controlled, easy to undo.
Composite Layout Ideas
Layer cityscapes inside fashion silhouettes. Stack landscapes inside coffee mug shots. The cut out mask logic stays the same. Container shape down. Content image up. Clip.
For deeper image work, browse our Photoshop masking breakdown.
Working With Smart Objects for Editable Clipping-Mask Layouts
Smart Objects are like shipping crates. They protect what’s inside. Adobe says Smart Objects preserve source content and resize without quality loss.

Why Smart Objects Save Time
Right-click your photo layer. Convert to Smart Object. Now scale up, scale down, transform. Pixels stay sharp.
Replacing Content Later
Need a different product photo in the same layout? Right-click the Smart Object. Replace Contents. The clipping mask still works. Layout untouched.
Keeping Quality Intact
Linked Smart Objects update across files. Change once, update everywhere. For agencies running 200 catalog pages, this is gold.
How to Combine Clipping Masks With Gradients and Overlays
Style without bloat. That’s the goal here.

Gradient Maps
Add a Gradient Map adjustment layer. Clip it to the photo. Mood shifts in seconds. Sunset, monochrome, duotone. All editable.
Solid Color Overlays
Need a brand-colored tint? Solid Color fill layer above the photo, clipped. Lower opacity to taste. Mask color photoshop becomes one slider away.
Blend Modes for Style
Try Overlay or Soft Light on the clipped layer. Texture pops. Skin keeps detail. Tiny change, big payoff. Use adjustment layers with clipping masks in Photoshop for non-destructive control.
Common Mistakes When Clipping to Text, Shapes, and Images
Most clipping mask photoshop fails come from three errors.

Wrong Layer Order
Photo below the text? Nothing happens. The container has to sit below the content. Move the photo above the text. Then clip.
Unreadable Text
Background photo too busy. Letters too thin. Color contrast too low. Fix one, the effect saves itself. To apply a clipping mask to text in photoshop properly, design for the smallest screen first.
Low-Resolution Source Files
A 600px photo inside a 1200px headline? It pixelates. Always start with high-res files. Smart Object the photo so future scales stay crisp. Save your clipping mask PSD layered for re-edits.
For deeper fixes, see troubleshooting Photoshop clipping masks.
Exporting Clipped Designs for Web, Print, and Social
Adobe’s Quick Export supports PNG, JPG, and GIF.

PNG vs JPEG
PNG keeps transparency. Use it when your clipped design sits on a colored background. JPG is smaller and fine for solid-bg posters and ads. What’s worse than a blurry mockup in 2026? A 4MB hero image that loads at the speed of dial-up.
Resolution Checks
Web and social: 72 dpi, sRGB. Print: 300 dpi, CMYK. Same clipping mask PSD. Different exports.
Flattening Only When Needed
Don’t flatten your master file. Save the layered PSD. Export flat copies. Need 50 SKU edits next week? You’ll thank yourself. For bulk runs, our product photo editing service handles export presets across thousands of files.
When to Use a Layer Mask Instead of a Clipping Mask
Clipping vs layer masking is a use-case call, not a rivalry.

Soft Fades on Text
Want letters fading from solid to transparent? That’s a layer mask job. Paint with a soft black brush. Adobe’s layer mask docs cover the hide-or-reveal logic clearly.
Selective Reveal on Images
Need to brush parts of an image away on a portrait? Layer mask. To make a mask in photoshop, click the Add Layer Mask button at the bottom of the Layers panel.
Decision Shortcuts
Use a clipping mask when another layer’s visible shape should define the reveal. Use a layer mask when you want painted, soft, or graduated control. Read the full difference between clipping mask and layer mask.
Frequently Asked Questions
Can I clip multiple images into one text layer?
Yes. Adobe confirms multiple layers can sit in one clipping mask, as long as they’re successive layers above the base.
Can I edit the shape later?
Yes. As long as you keep the base shape as a live vector or text layer. Don’t rasterize early.
When should I use a layer mask instead?
For soft fades, painted reveals, or fine-tuned edges. Clipping mask is for crisp, shape-driven cuts.
Should I outsource mockup and production edits?
If you handle 500+ SKUs a month, yes. We provide hand-drawn clipping paths and high quality photo editing services. Upload two or three images for a free trial. We’ll do tests within 45 minutes or less. Most jobs finish in 24 hours.
Ready to scale your image work?
Try our Image Masking Service or Product Photo Editing Service. Email sales@clippingphotoexperts.com or call +88 01981-449221.
Over the past 12 years, we’ve helped photographers, retail stores, and ecommerce agencies impress customers and improve sales conversion rates with cost-effective photo editing.

Shahidul Islam
Founder & Managing Director at Clipping Photo Experts
Helping photographers, brands, and ecommerce businesses create stunning visuals through professional photo editing, image masking, retouching, and post-production services. Passionate about sharing practical Photoshop and photography insights based on real-world experience.