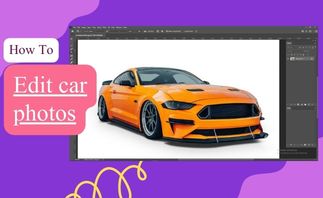
Imagine you have some mind-blowing collections of cars in your outlet, or you manufactured some to sell. It would be best if you obviously had to photoshoot the vehicles and market them to the audience to generate sales. Here car photo editing plays an important role, and if you are from car dealer marketing who deals and sells cars, then “How to edit car photos?” should be one of the million-dollar questions for you.
Though the answer is simple, if you do not know professional image editing, it is better to leave it for the professionals. There is a reason for that, and today, in this article, I will tell you about these reasons alongside showing you how to edit car stock photos as well.
What Is Car Photo Editing?
To market your mind-blowing collection of cars to the targeted audience, you have to professionally photoshoot them using photographers. Only photo shooting them isn’t enough because images directly from the camera lack the pleasant look that can attract buyers. They require professional editing as well. In the field of graphic design, there are a few necessary steps that are almost always required. This includes clipping paths, background removal, color correction, retouching, and shadows.
You can photoshop cars and make them jaw-dropping, which can generate sales. But why photoshop? Why did I tell you to edit car photos in photoshop? Because Adobe Photoshop is the only professional image editing software that can provide you the results you are looking for.
The colors of vehicles are primarily glossy, and on top of that, these all are luxury products. So the buyers always want to see flashy car images in the posters and ads. So use highly experienced experts to have the most professional car photo editing for your collections.


Car Image Photoshop Remove Background And Changing
So it’s obvious that your car photos require heavy and professional editing to stand out in the market. Now in car image editing, there are several steps, and background removal is one of the most important ones of them.
In this segment, I will show you how you can remove the background of your cars in photoshop by doing some easy steps. Follow the below process accordingly.
Step 1: Open Your Car Photography In Adobe Photoshop
In the first step, you have to open your car photo in adobe photoshop. You can do it by dragging your car photography to photoshop after opening it. All you need to do is drag and drop the image. Or you can go to the top left corner, click on the File menu, select the Open option, select the image, and click Insert to do this process.

Step 2: Create A Duplicate Layer For Background Removal
The second step is significant for background removal and any other image editing you perform. Create a duplicate layer of your original image. When you insert an image, it opens as a layer in the layer panel, and it is the original layer.
So now, if you start editing your image, you will be editing on that layer, and any changes you make will affect the original layer. It gets difficult to go back if any problem occurs and so creating a duplicate layer will allow you to work on the duplicate layer instead of the original one.
Choose Duplicate Layer from the Layers panel More menu to create a duplicate layer. Name the duplicate layer, and click OK. Or you can select the original layer and press Cmd + J (Mac) or Ctrl + J (PC) to duplicate the layer.

Step 3: Using Pen Tools For Selecting The Area
After creating the duplicate layer, it’s time to select the background we want to remove. We have different ways and tools to select subjects in photoshop, and the pen tool is one of the best of them that provides better accuracy than others.
You can find the pen tool at the left Toolbar. You can select from there or press P on the keyboard as a shortcut to select the tool. After selecting the tool now, all you need to do is create paths around the edges of your subject. The process that we are going to do is also known as clipping paths or silo paths.
Pen tools in photoshop use anchor points to create paths. So using the anchor points, create paths around the car and select them.
Pro Tip: To get the best accuracy, zoom in to the image as much as possible and use hard anchor points.
Get Fast, Affordable, and Efficient Car Photo Editing service

Step 4: Select The Path And Invert The Area For Background Removal
After step 3, you will have your subject selected by the recently created paths. In step 4, we will now select the Path Layer ( under the layer panel) and then invert it. Why invert? Well, we have created paths around the subject and selected it.
But to perform background removal, we need to select the background. So by inverting the selection, we will be able to select the background. To invert the selection, press CTRL+SHIFT+I as a shortcut, and it will be done.

Step 5: Delete The Background
After inverting the selection, we now have selected the background, and it’s time to delete it. While selecting the path layer, press the Delete button, and the background will be deleted.
Step 6: Show The Final Result
If you want to have a transparent background for your image, then after deleting the image background in the previous step, you will have the final result. With the current result, you can go further and do background changing to add different and exciting backdrops to your car photo.

Creating Car Shadow In Photoshop
When you remove the background from the car photos and make it transparent, you also lose its shadow. Without shadow to your image, it will look unrealistic. Apart from that, sometimes, the photographer also misses portraying the shadow effect in the picture because of lighting issues.
Creating car shadows in photoshop remains the only option for you in these scenarios. That’s why creating shadows for car photos is mandatory. Below we will learn how to create shadows in photoshop for car images with simple steps.
Follow The above Step from 1 To 5 until removing the image background. Now continue with the below steps to learn further.
Step 6: Create Empty Layer
After removing the background in step 6, we need to create an empty layer. Create an empty layer between the original and duplicate layers you have created earlier.

Step 7: Create Drop Shadow
Now we will add a shadow underneath our car. It is also known as a drop shadow. Shadows have different types, but we will learn to work with a drop shadow in this tutorial.

Note: Below, we will also talk about all the types of shadows. So stay with me to know about shadow creation in photoshop!!!
So going back to create drop shadow in photoshop, we will click on the “fx” button, which we will see at the bottom of the layer panel. After clicking the “fx” button, a drop-down menu will appear, and from there, select the drop shadow option. A window with all the drop shadow settings will appear. Adjust the settings according to your requirements and then click OK.
Step 8: Make The Shadow Realistic
To make the shadow realistic, you can adjust Gaussian blur from the Filter menu. It will make the shadow look more natural. Also, change the opacity if needed.

There Are Many Types Of Shadow
I have mentioned above, and I will talk about the types of shadows we can create in photoshop. So here you go!
Drop Shadow Photoshop
Drop shadow photoshop is a popular shadow creation service for car images. Drop shadow is created under the product to make it look grounded. After photographers completed their photoshoot with cars, it went for post-processing. Photoshop professionals keep the subject and remove everything. In the process, the original shadow of the product (in that case, cars) also gets removed. Experts photoshop cars and add a drop shadow to bring back the bottom shadow in these circumstances.
Natural Shadow
As the name indicates, the natural shadow process in Photoshop enhances the original shadow of the image. Sometimes while doing the car photoshoot, photographers fail to keep the actual shadow of the product intact because of getting other important things right such as lighting, framing, etc. On the other hand, the original shadow gets ignored to keep pace with trending and viral car photoshoot ideas. So in post-processing, professionals enhance the natural shadow using photoshop.
Reflection Shadow
Some photographing styles require reflecting surfaces. Sometimes your product might need to reflect itself on the surface to make it more attractive. Using an actual reflective surface and photo shooting is a bit expensive. Adobe Photoshop offers all the options to create reflection shadows for photos. Reflection shadows provide mirror effects to product images.

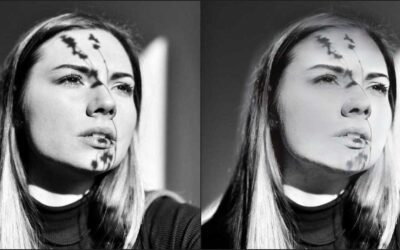
How to edit car photos doing Retouching
Retouching cars photos in photoshop is also a popular car photo editing service for car dealers and manufacturers. Because it is the car retouching process where most of the magic happens, it’s a perfect package for prominent marketers who want just to hand over their stock car photos and receive extraordinary mind-blowing ideal product photos for their marketing. Below I will give you a short and accessible tour of retouching vehicle images in photoshop
Step 1: Open Your Car Photography In Photoshop
Like all the car image editing processes, we will insert the car photo that we want to retouch in photoshop. You can follow the first two steps of the background removal service from above to get started.
Step 2: Select Your Clone Stamp Tool For Car Retouching
In-car photo retouching service, editors find the imperfect area from your gorgeous-looking cars and fix them. Any scratches, dust, color imbalance issues caused by the lighting and beautification can be done in retouching. The clone stamp tool is one of the best for this process. So select the clone stamp tool from the left Toolbar.

Step 3: Select The Car Damage Or Dust Area You Want To Retouch
After selecting the tool in the previous step, you need to find the unwanted spot or dust area and select it using the tool. As the name suggests, the clone stamp tool in photoshop will clone that area, and after that, if you select a perfect spot, it will replace it with the damaged area. You have to adjust the tool’s opacity as per your requirements to get the best result for your photo.

The default opacity is 100%, and it will work fine, but you can try different ones such as 50-60% first and then increase gradually if required.

Car Sky Remove Or Replacement
Producing unique and jaw-dropping car designs isn’t enough to attract customers. The car sky removal or replacement process can boost your vehicle images and your sales. Sometimes while photographing cars, you get the background blown out, or the sky gets oversaturated. With the sky replacement in photoshop, you can remove the dull sky with a perfect one. So without further ado, let’s learn how to do sky replacement in photoshop and make ordinary car photography best.
Before starting, I would like to suggest you follow the first three steps from the background removal process above and then come back to this step to continue. Because to change or replace the sky from your image, you need to insert your image and then select the background.
So after completing step 3, here is step 4 for you to continue.
Step 4: Select The Sky Are Using Photoshop Pen Tool
This step will select the pen tool from the Toolbar and then create paths around the sky area that we want to remove or replace

Step 5: Remove The Background Adding New Sky
Before coming to this stage, we will have the background or sky of our car image selected. In step 5, we will delete the sky area and add a new sky to the picture. In the latest Adobe Photoshop, sky replacement has become very easy. You will find an in-built option to do it. You don’t even need to remove the sky area with the new photoshop software.

All you need to do is click on the Edit menu and, from there, select the Sky Replacement option. Select the sky from the default ones, click OK, or insert a new sky from your device and replace it.
If you are using an older version of photoshop, open your new sky image in another window in photoshop. To add this to your image, you must first delete the selected sky area. Let’s say you have deleted the selected sky area. Select the new sky, copy it, and paste it on the layer panel. You will see your new sky layer on top of the other layer. Click and drag the layer under the layer you were editing. After that, click on the layer and press CTRL+T to add the new sky to the image.

Step 6: Select Brush Tool For Smoothing
In this step, all we will do is smooth up the edges so that it blends with the image. Select the brush tool in photoshop and brush over the edges to make the adjustments more smooth and clean. With that, your car photo sky replacement is done, and if you have done it correctly, you will have a completely different yet eye-pleasing result.

Final: See your final images

How to edit car photos by reflection removal from glass
Glasses are the most reflective material you will find on earth. So it’s normal to have a reflection on your car’s glass. You can remove the glass reflection using photoshop software quite easily. To remove glass reflection from your car image, follow these simple steps below:
- Open your image in the software.
- Select the pen tool from the left Toolbar.
- Select the glass area by creating paths around it that you want to fix.
- After that, while you select the path, press Ctrl+Enter.
- Now select the brush tool in photoshop and choose white color.
- Choose the opacity between 25% to 30% to get the best result.
- Using the brush tool, paint over the selected area with reflections, and all the reflections will turn white.
And it’s done! The glass reflection will go away for good.
Summary
In this article, I have brought you a complete step-by-step car photo editing tutorial where you can learn how to edit car photos in photoshop with ease. If you are not an image editing geek, my suggestion would be to use proper professional editors to edit your images if you have a bulk amount of files that you need to edit. If you are looking for professionals where all you can do is hand over the images and get a complete solution, then we are the best for sure.

Shahidul Islam
Founder & Managing Director at Clipping Photo Experts
Helping photographers, brands, and ecommerce businesses create stunning visuals through professional photo editing, image masking, retouching, and post-production services. Passionate about sharing practical Photoshop and photography insights based on real-world experience.
See Our Related Blogs