How to remove unwanted objects in photoshop | 3 Easy way
Almost 95% of product images we see on online stores are on a white background without unwanted objects. Unwanted objects in the frame can harm any photo by giving an unpleasant viewing experience to the viewer. And as an eCommerce retailer, you must ensure that as well.
Learning how to remove unwanted objects in photoshop will help you ensure that. It will help you remove objects from photos and make your image user viewing friendly.
For people like e-commerce retailers, becoming an expert in photo editing and removing objects from their photos is not mandatory. And so this step by step guide on how to remove unwanted objects in photoshop can be a solution that you must be looking for.
Below I have used three photoshop tools for today’s object removal tutorial that are very easy to learn. These tools are:
- Spot Healing Brush Tool
- Clone Stamp Tool
- Path Tool
Remove unwanted objects using spot healing brush tools
Getting unwanted objects in the frame is always a bummer for professional photographers, as it takes a lot to capture a good photo. Photoshop spot healing brush tool can remove any unwanted object from an image with some simple steps. Follow the steps below:
Step 1: Open the photo in photoshop
Open the photo you want to edit in photoshop. You can drag the image and drop it on the artboard. Or you can click on the File menu and browse the storage, find the image you want to edit, select it and click Insert to open in photoshop.
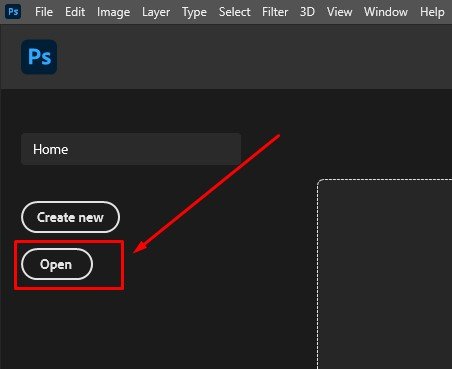
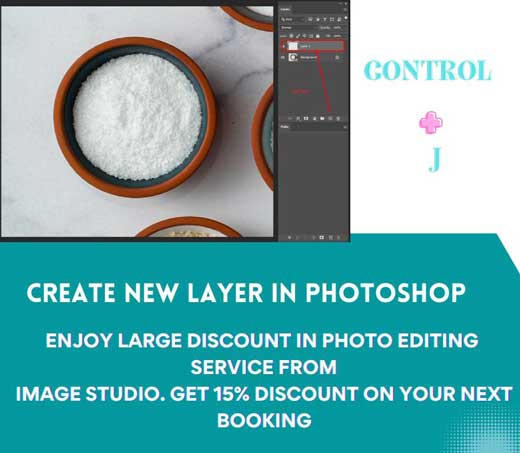
Step 2: Create a new layer for removing unwanted objects in photoshop
After inserting the image into photoshop, we will see that an original layer is created automatically by adobe photoshop at the right side of the screen. We can start editing on the original layer. But what if we make some minor mistakes or want to undo some changes during the object removal process in photoshop?
We can’t go back, and our original image will get ruined easily. After inserting the image, we need to create a duplicate layer from the original one. Select the original layer and press Control + J (PC) to create the duplicate layer.
Step 3: Zoom at the unwanted object you want to remove
Now, zoom in on the unwanted object area you want to remove from the photo. Zooming in to the right area is an essential step as if you don’t be careful with this, you might erase the picture as well.

Step 4: Select The Spot Healing Brush Tool from the tool panel and select content-aware type
This step will select the spot healing brush tool in photoshop. To choose the brush tool, go to the Toolbar on the left side of your screen. Find an icon like a paintbrush, click on that and select the Tool. After that, go right under the menu bar and select Content-Aware type. It will help you to fill the area that you will erase.

Step 5: Brush Over The Object You Want To Remove Unwanted Object
Now you are ready to remove all the unwanted objects and distractions from your photo. All you need to do is brush over the object you want to remove. With the algorithm of content-aware fill, photoshop will automatically erase the distraction and fill it with appropriate content from the image.

Step 6: See the final result
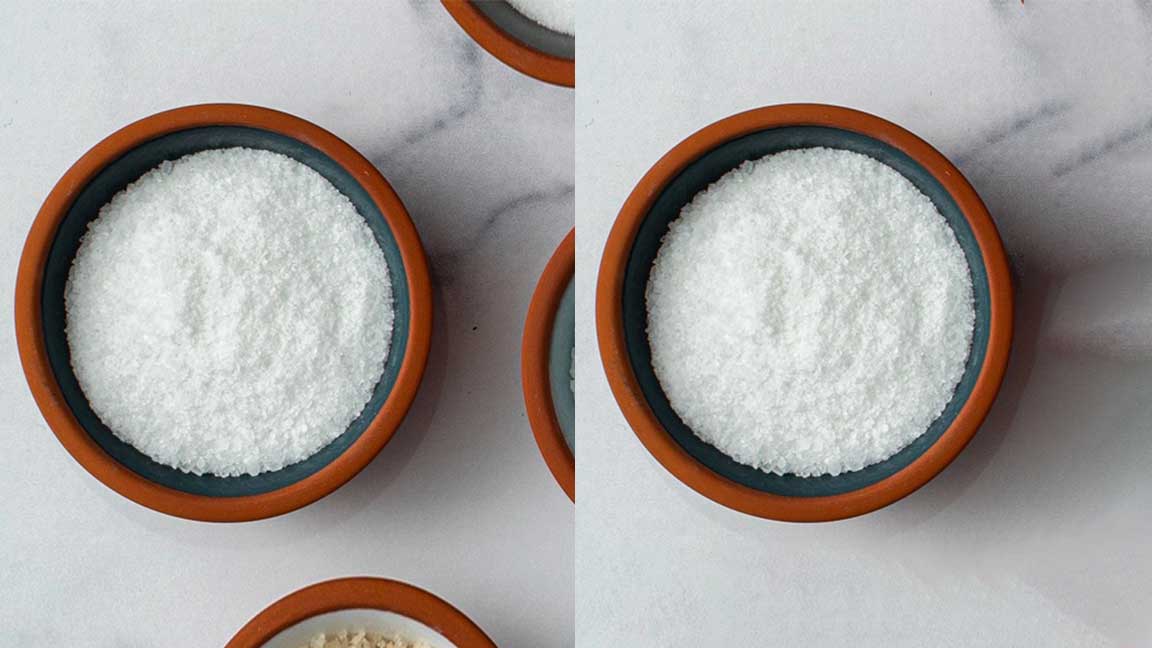
When you are done brushing over all the unwanted objects, zoom out and get to the standard frame. You will notice that you have removed all the objects from the photo. While we remove objects from the image, we must remember to zoom in to the specific area.
How to remove unwanted objects in photoshop – using clone Stamp Tools
This segment will learn how to remove unwanted objects in photoshop using the clone stamp tool. As the name suggests, this Tool simply clones an area and replaces it with another. So how will we use this in our object removal process? We will select the area with unwanted objects and then replace it with a fresh area.
Yes!!! It’s that simple.
So without any delay, let’s get started…
Follow steps one and two of Remove unwanted objects using spot healing brush tools.
The first two steps of this process are similar to the previous one. So follow steps one and two of removing unwanted objects using a spot healing brush and then see the below steps accordingly.
Step 3: Select the Clone Stamp Tool from the tool panel
You will find the clone stamp tool in the left Toolbar. So in this step, go to the Toolbar and select the Tool. Here we won’t change any other settings from the options right under the menu bar. You can adjust the brush size if you need.

Step 4: Go to the unwanted object area
Now, zoom in and find the areas with unwanted objects and distractions. We will get a sample from a new area using the Tool first and then go to the area we want to remove.
We will sample the nearest fresh area and do it for every unwanted object to replace the faulty area with a fresh one without making it look weird or unmatched.
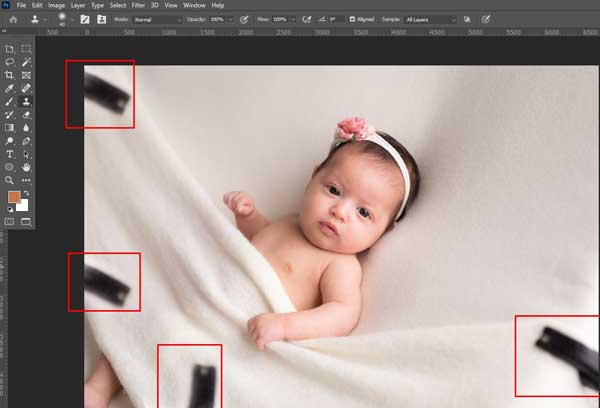
Step 5: Press Alt until the cursor turns into a crosshair. Click on the area you want to sample.
I have mentioned that we will take a sample of a new area first, but how will we take it? Well, all you need is to press the Alt button, and you will see that the cursor turns into a crosshair. Now click on the area that you want to use as a sample, and you will have it.
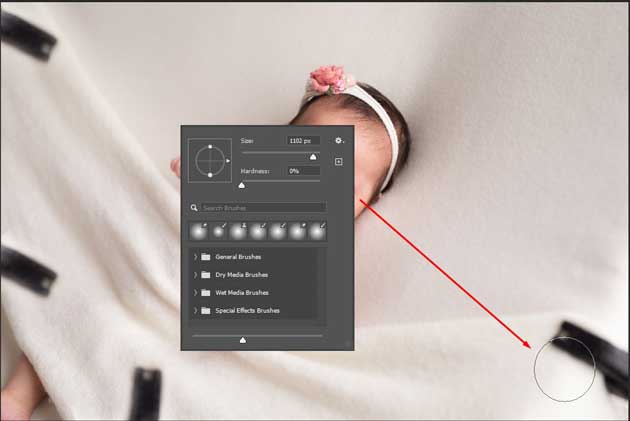
Step 6: Brush on the object you want to remove unwanted object
Now, brush on the unwanted object that you want to remove using the clone stamp tool, and the sample one will replace it. Repeat the process again and again to remove all the unwanted objects. With this, you have learned how to use a clone stamp tool.

Step 7: See the final result
When you are done replacing all the areas, see the final result, and you will surely get a surprise. All your distractions will go away, and your image will look more attractive and flawless.

How to remove unwanted objects in photoshop – Using Patch Tool
No matter how good your raw photography is, images can pick distractions anytime. This is the last segment of today’s photoshop tutorial for removing unwanted objects and distractions in photoshop. In this part, we will learn how to remove unwanted objects in photoshop using the patch tool with some easy steps below.
Step 1: Follow steps one and two of Remove unwanted objects using spot healing brush tools.
Like the previous segment, we will follow the first two steps of removing unwanted objects using the spot healing brush tool. Inserting the image into Photoshop and creating a duplicate layer are the most common but significant steps you should follow every time.
Step 2: Select Patch Tool Form Tool Panel
Now go to the Toolbar and select the patch tool to get started. The patch tool in photoshop is also one of those tools that allow you to remove unwanted objects from the image with some simple steps.

Step 3: Draw a line around the object you want to remove
After selecting the Tool, go to the area or object that you want to erase and draw a line around it. Path tool basically works like replacing the faulty area with the right one that you select.

Step 4: Drag the Selection To An Area That You Want To Use As A Patch Sample.
Now drag the select area into a clean one that you feel is perfect. This perfect area is also known as the patch sample area. You can compare the photoshop cc patch tool with a one time bandage.

Finally, save your work.
Using the photoshop patches after you complete removing all the unwanted objects from the image, just save the file to your device.

Conclusion
For professional eCommerce retailers, knowing how to remove unwanted objects in photoshop can prove to be a worthy investment. But often don’t have enough time to learn all those tricky professional image editing processes.
So in this article, I have presented the three easiest ways that don’t take much time to learn. Even if you are a beginner who wants to edit images quickly, you can follow this tutorial.





Recent Comments