Advanced technique How to do high-Quality hair masking
Often photo editors struggle with hair masking. Do you know why?
The key reason is that they lack the right know-how on hair masking photoshop. So, they become unable to apply this technique even when they remove the background from an image.
This post is all about sharing information on advanced high-quality hair masking. Even seasoned photographers, graphic designers and also digital artists feel perplexed while applying hair masking.
Because it is not just about how to cut out hair in photoshop or making a clean selection. It involves preservation of natural flow and intricate details of the hair, ensuring the final image looks seamless and realistic.
This post will inform you step-by-step about the processes in a smooth and comfortable way. Let’s start exploring the guide.
What is a hair mask?
A photoshop hair masking is a technique used to precisely isolate and edit hair within an image. Hair masking is particularly useful in scenarios where the subject needs to be placed on a different background or when making adjustments that require precise selection, such as color corrections or applying effects.
Moreover, hair masking is also required for a wide range of business and trading activities. It includes e-commerce or f-commerce outlets or retailers. The outlets need images with their background removed. But when there are some hairy issues in the images, the overall look of the photo takes a ghastly turn. But the service is able to restore the authentic and impressive outlook of the products (or services) they provide.
The photoshop mask tool typically involves using tools like the Quick Selection Tool, Refine Edge Brush, and the Select and Mask workspace to create a detailed and accurate selection of the hair. By creating a mask, edits can be made non-destructively, allowing for flexibility and high-quality results.

Basic Photoshop hair masking
Before we explore hair masking, it is essential to have a foundational understanding (the basic knowledge – in other words) of this technique. Primarily, the process removes or separates the hair of the photo subject from the image background which may involve accurate editing.
Using the masking tool photoshop, this is a basic technique used to isolate and edit hair while preserving its natural texture and detail. It involves creating a selection around the hair and refining it to capture fine strands and intricate patterns.
Even though it is a daunting task in a photoshop channel but with meticulous attention and practice, one can master the skill of hair masking in Photoshop. In order to get rid of these issues, Photoshop comes up with a wide range of tools and features, particularly for hair masking.
The tools include – pen tool, brush tool, Refine Mask. They offer different methods for reaching accurate selections.
By understanding the basic concepts of photoshop cut out hair and tools used in hair masking, you set the foundation for mastering this detailed process. We will dive deeper into this technique, exploring advanced methods and strategies that will improve your hair masking skills. Join us on this journey to learn the secrets of hair masking in Photoshop.
By understanding the basic concepts of photoshop cut out hair and tools used in hair masking, you set the foundation for mastering this detailed process. We will dive deeper into this technique, exploring advanced methods and strategies that will improve your hair masking skills. Join us on this journey to learn the secrets of hair masking in Photoshop.
Important adobe photoshop tools to do high-Quality hair masking
Achieving high-quality hair masking requires the use of several powerful mask tool in photoshop designed to handle the intricacies of hair with precision. This guide will introduce you to the most important Photoshop tools for hair masking, explaining how each one contributes to isolating and refining hair details.
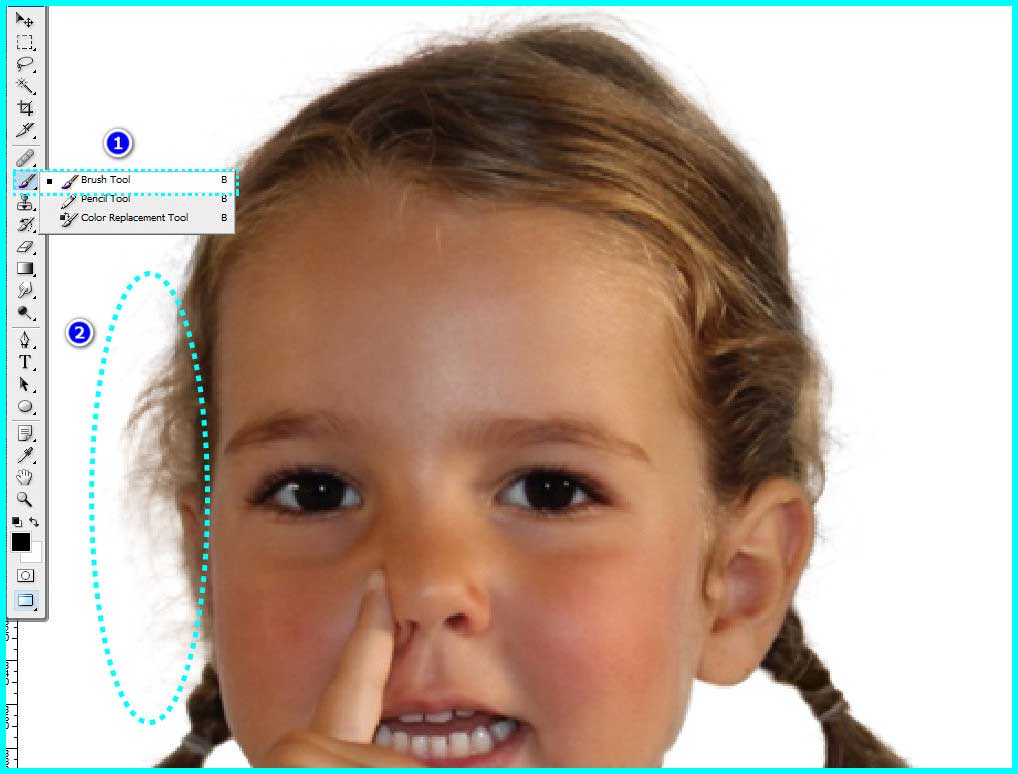
Brush Tool: versatile and important tools for fine detailing
The brush tool photoshop is one of the most versatile and important tools for achieving fine detailing in hair masking. It allows for precise control when refining the edges of your hair mask. It also makes sure that even the most intricate strands are accurately represented. By adjusting the brush size, hardness, and opacity, you can meticulously paint on the layer mask to hide or reveal specific areas of hair.
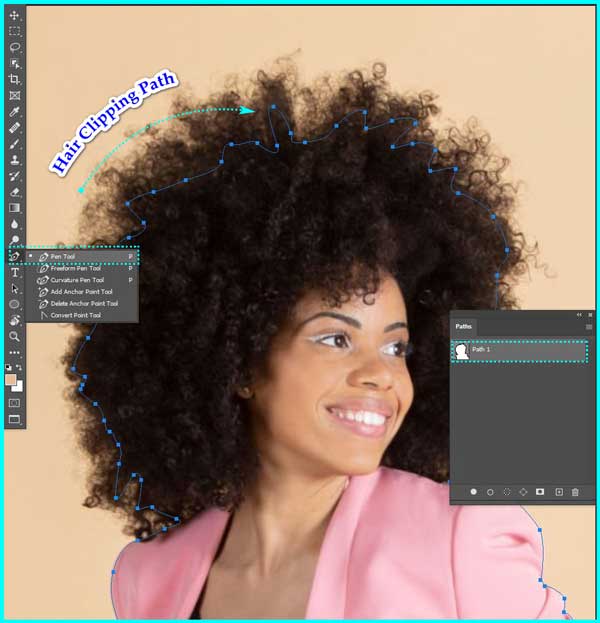
Pen tools: Essential Perfect Result drawing tool
The Pen Tool in Photoshop is an essential tool for achieving perfect results in hair masking photo. The Pen Tool allows you to draw accurate paths around complex hair edges. By creating anchor points and adjusting the curves, you can outline the hair with careful detail. This tool is particularly useful for isolating hair from backgrounds with high contrast or intricate patterns. Once the path is created, it can be converted into a selection or a layer mask.
Layer masking: Non Destructive editing
Layer masking is a crucial technique in Photoshop that allows for non-destructive editing. When you use a photoshop layer mask, you can hide or reveal parts of a layer without having to change the original image. It is essential for hair masking, as it lets you refine and adjust the hair’s edges with precision.
If you paint on the layer mask with black or white, you can control which parts of the layer are visible or hidden. This method allows for detailed adjustments, and ensure that fine hair strands are accurately represented and blended seamlessly with the background.
Moreover, layer masking has the ability to make corrections and tweaks without damaging the original image, giving the freedom to experiment and achieve perfect results. Thus, this non-destructive approach is fundamental for professional-quality hair masking in Photoshop.

Why is Photoshop hair masking important?
Photoshop hair masking is important because it allows for precise isolation and editing of hair, which is often complex and detailed. This technique is essential for creating professional-quality images, enabling seamless background changes, selective adjustments, and realistic composite images. Hair masking ensures that fine strands and intricate textures are preserved, maintaining a natural look.
Step-by-step guide on how to make advanced high quality hair masking in adobe photoshop
Step -1 : Launch the Image
For the select hair photoshop, go to Photoshop and open the image you want to edit.
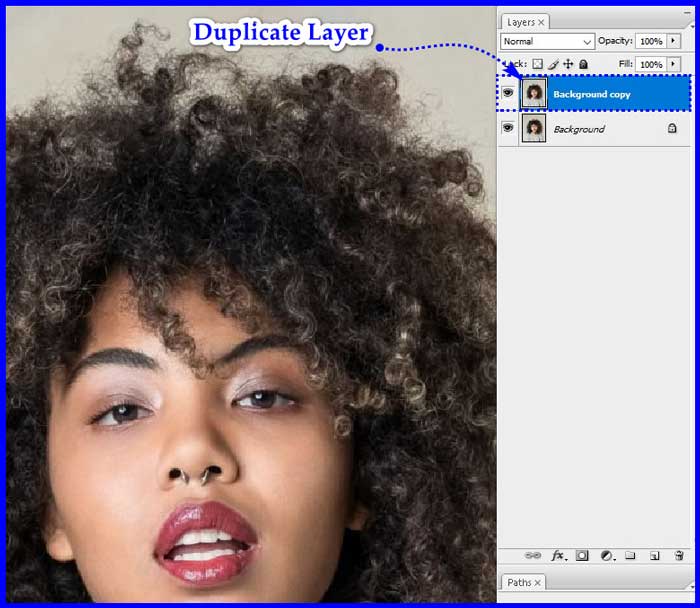
Step -2 : Layer duplication
In the Layers panel, right-click on the image layer and select “Duplicate Layer.” This preserves the original image.
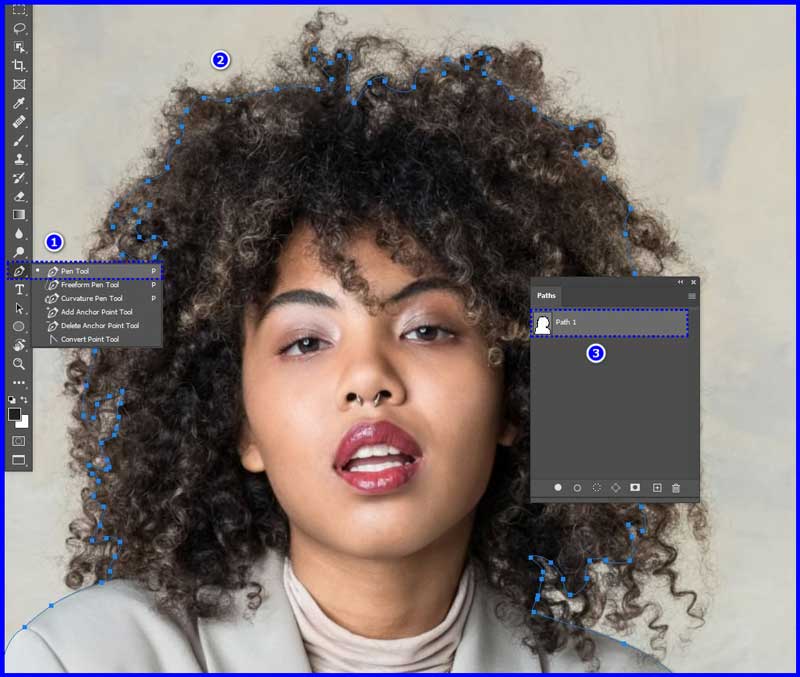
Step -3 : Apply the Pen Tool
Select the Pen Tool (P) and carefully create a path around the hair, following its contours with full attention.
Step – 4 : Now, select the Path
Right-click on the path you just made and choose “Make Selection”. Feather the selection by a pixel or two for a softer edge.
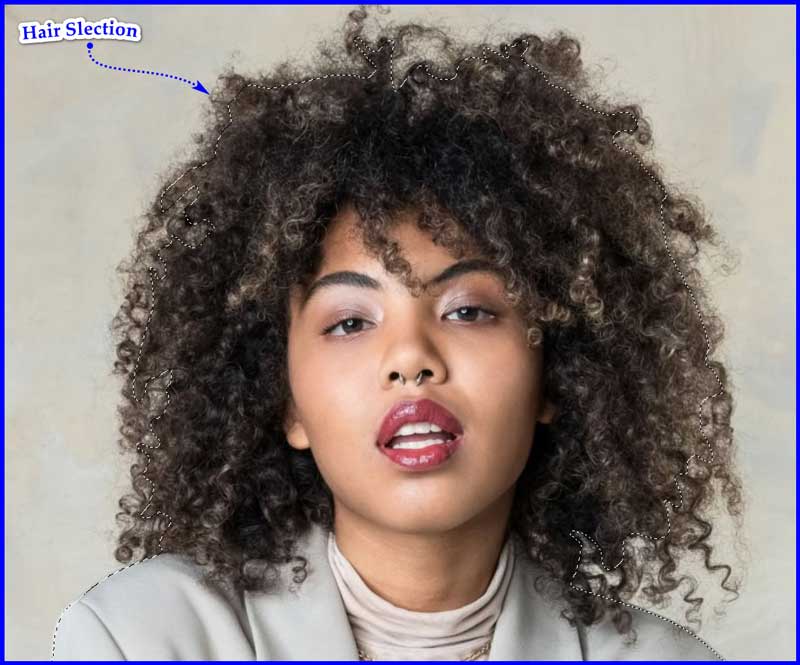
Step – 5 : Layer Mask Application
As the selection has activated, click the “Add Layer Mask” button of the Layers panel. It will remove the background and reveal the hair.
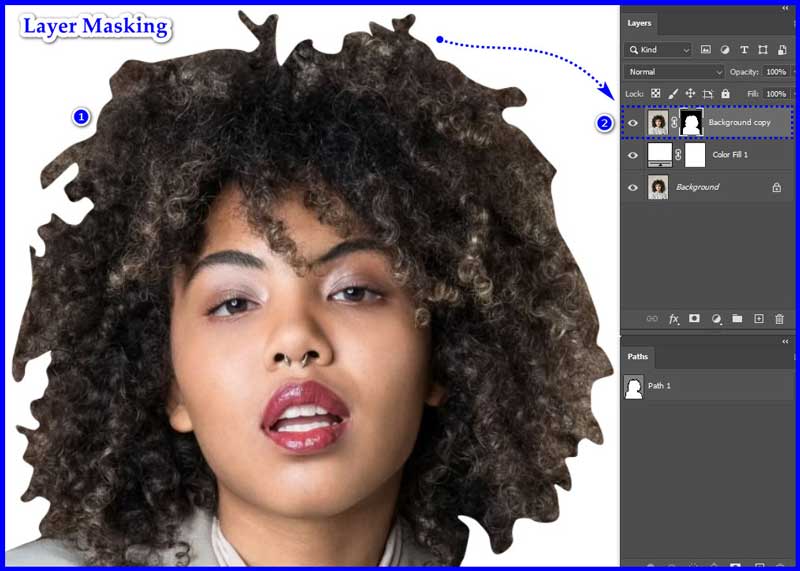
Step – 6 : Mask Refining
To refine the hair mask further, you can use the “Select and Mask” tool by adjusting the sliders to make the edges look natural.
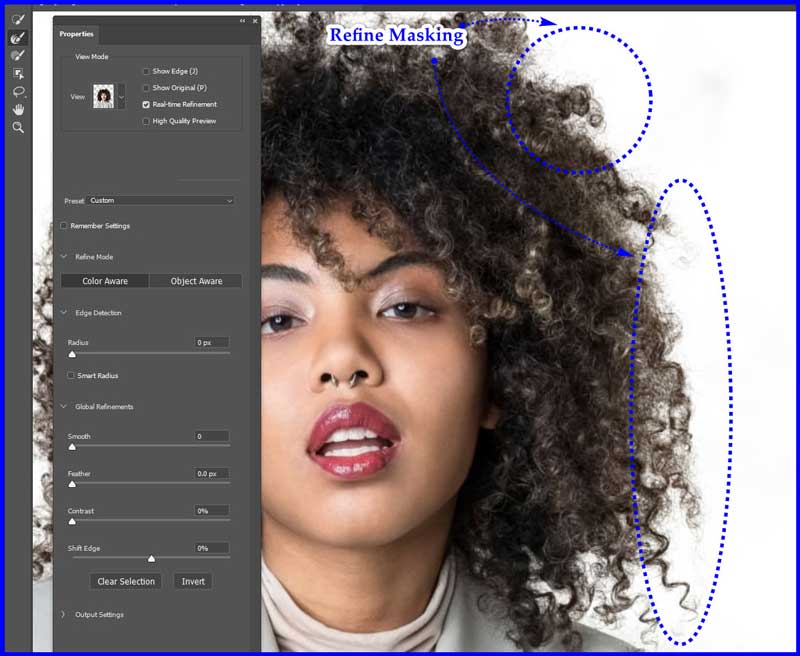
Step – 7 : Adjust/ Apply Effects
As the hair is now successfully isolated, you may now apply effects, change the background or make some adjustments to the subject according to your desires.

Tips and Tricks for high quality hair masking
Here are some tips and tricks to help you master this complex task of hair masking photoshop:
1. Use High-Resolution Images:- Higher resolution images capture more detail, making it easier to isolate fine hair strands.
2. Choose the Right Tools:-
- Quick Selection Tool: Great for initial selections.
- Pen Tool: Perfect for creating precise paths around hair.
- Refine Edge Brush: Ideal for fine-tuning the selection.
3. Use Layer Masks for Non-Destructive Editing:-
- Flexibility: Layer masks allow you to hide or reveal parts of the image without permanent changes.
- Refinement: Use a soft brush to fine-tune the mask.
4. Zoom in for Precision:- Zoom in on the edges to ensure fine strands are accurately masked.
5. Adjust Brush Settings:-
- Soft Brushes: Use soft round brushes for smooth transitions.
- Opacity and Flow: Adjust these settings to control the intensity of your brush strokes.
6. Test with Different Backgrounds:- Place the masked hair against various backgrounds to ensure it looks natural in all settings.
7. Practice diligently:- Hair masking is a meticulous process that requires time and careful adjustments.
By combining these tips and tricks into your workflow, you can get professional hair masking results, ensuring your images are of high-quality and refined.
Last words:-
We are about end the exploration on hair masking. Mastering this particular skill in Photoshop is essential for getting professional-quality image edits, especially when dealing with complex hair details.
This is a special technique which allows designers to adjust a precise selection for accurate isolation and manipulation of hair, ensuring natural and seamless results.
By utilizing tools like the Quick Selection Tool, Pen Tool, and Select and Mask workspace, and refining with layer masks and brushes, you can reach remarkable accuracy.
High-resolution images and attention to detail further enhance the outcome. With practice and patience, these advanced techniques will elevate your photo editing skills, giving you the ability to create stunning, realistic images with perfectly masked hair.
However, if you are in need of any professional hair masking service, you can reach us. We render the industry-best services at an affordable price range.


Recent Comments