A Step by step Guide on Photoshop Masking Service
Photoshop masking is the latest addition of Photoshop. This new feature image masking service is being applied for extreme specification of a portion of an image. However, If you use Photoshop very often, you will easily understand the photo masking Services.
But such image masking may seem difficult to understand if you are a newbie in the sector of graphic design. Considering that, in this article, you will get to learn about the step-by-step guide on Photoshop masking services.
Let’s get started……
What is Photoshop masking in Adobe Photoshop?
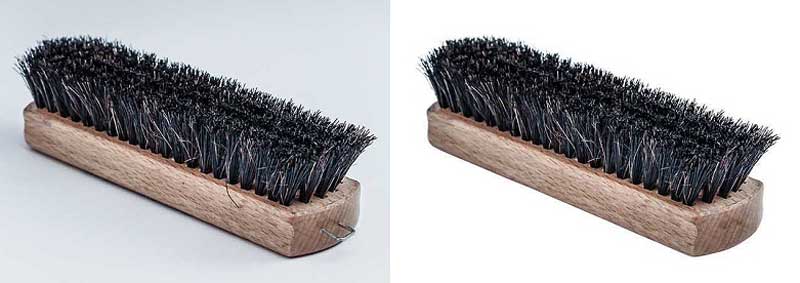
Photoshop masking is a great way to cover up or mask any image without removing or erasing them. Such photography masking can be an awesome idea to make the image more moderate, nicer, and composed.
In Adobe Photoshop, a Photoshop mask specifies every effect on a picture, it removes or cuts out objects, modifies background colors, and targets the edit more particularly for specific areas, so that you can easily clarify the particular portion rather than the entire layers.
Masking in Photoshop is a very good option to edit your image with more ease.

How many types of masking in Photoshop?
Masking in Photoshop comes in three different types. These three Photoshop maskings are:
- Layer masks
- Clipping masks
- And alpha channel masking
Layer masks: whenever think of masking images, the first name that comes to mind is the layer mask. A layer mask is a type of photoshop mask, that hides or reveals any particular part of a picture.
Clipping masks: In masking images, clipping masks are more likely to layer masks. Such masks define transparency in separate layers by using a single layer.
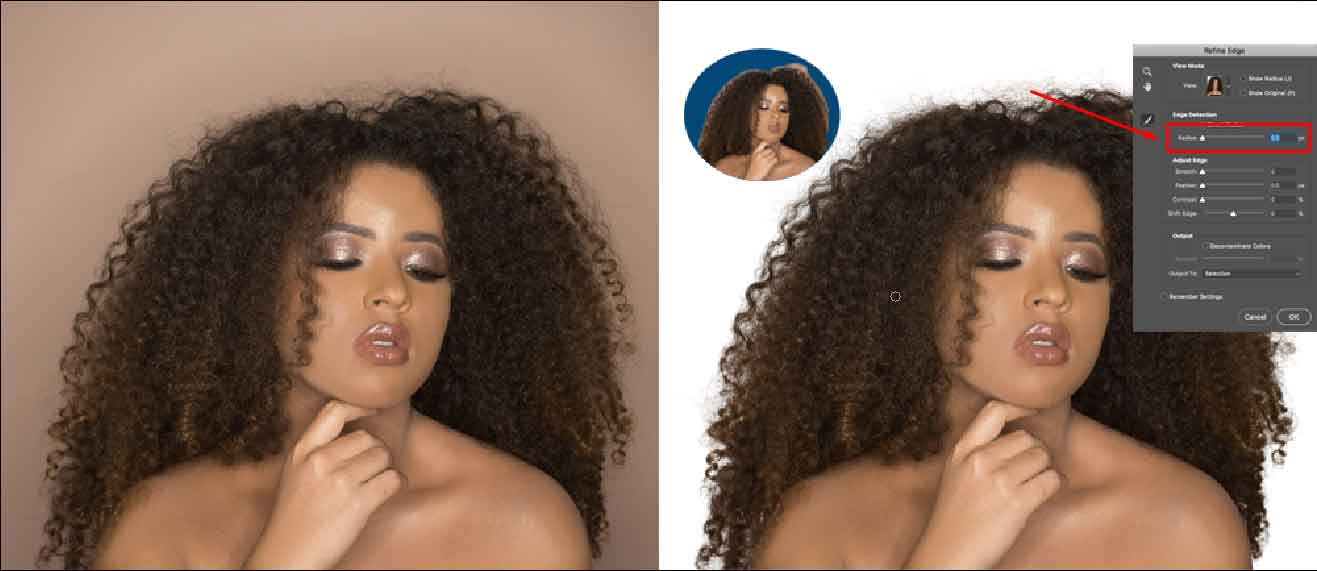
Alpha channel mask: Alpha channel Photoshop masks are kind of tricky masks in Photoshop masking. These masks are being used to cut off or remove objects like hair, jackets, furry, or much more complicated subjects from the image.
Case Study: High-Quality Hair Masking Service
Photoshop Layer masking
What is layer masking?
The layer mask is a kind of mask that tends to change the visibility of a particular layer. You can hide any portion completely or partially if you can use a layer mask in Photoshop.
How to make a layer mask in Photoshop?
A layer mask serves the benefit of hiding any portion of an image.
To make the layer active, you have to select the layer mask thumbnail. In this process, there will be two squared icons at the bottom to set the foreground and background colors.
Importance of layer masking: You will be amused to know the importance of layer masking. Such as:
- This mask complies with stacking or combining layers for revealing as well as hiding areas of a particular design.
- Photoshop layer mask also allows to modification of the background
- color or to removal or cutting of any object from the image very fluently.
- You can also add back those objects in the picture.
Mastering Layer Masks Photoshop: A Step-by-Step Guide
Where used to layer masking
Layer masking can be used for several purposes, such as:
- Tone controlling of any image
- Background blurring or controlling
- Making any black-and-white picture with selective colors
- Erasing or hiding any part of an image by using an erasing tool
- Attaching images
- Background color modification
- Cutting any objects from the image
- Specifying any edit to make the effect more particular
- Revealing or concealing any area of any picture.
Where not use layer masking in Photoshop masking?
There are some situations where using layer masking is not the right choice. Such as:
- If you need non-destructive edits, then it is better not to use layer masking.
- In case of complex selection, it is wise to skip layer mask photoshop.
- For vector shapes, you should avoid layer masking.

2. Clipping Masking
A clipping mask is a crucial type of mask in the field of graphic design where you can mask so many images with transparent visibility. You can limit the visibility of a layer in the shape of another layer. In this masking, the shapes look more visible and clear.
The purpose of clipping masking
Clipping masking is essential to make the layers between the image more clear. Such as:
- Controlling the visibility of layers
- Linking layers
- Making adjustments between the layers
- Following form and shapes without changing the content of the layers
- Base layer preservation
- Masking the layers above using the content of layers
How to create a clipping mask?
Creating a clipping masking in Photoshop is not a tough job. You can easily do this by following some simple steps. Firstly, you have to open Photoshop to create a new document or to open an existing one. Secondly, click on the new layer icon at the bottom of the layer panel. You have to place the layer as well as the mask that you want to clip it to. Do right-click and select the create clipping mask from the drop-down menu. After doing all these, you will find the mask layer clipped below it and the visible area visible.
Benefits of using clipping masking
Clipping masking in Photoshop has opened up a remarkable door for graphic designers. However, here are some benefits that you can get by using clipping masking.
- Clipping mask provides you the flexibility at its best. You can change the clipping mask at any time.
- This mask combines multiple pictures or layers nicely.
You will have a precise effect while applying adjustment filters or other editions without affecting the entire image. - Clipping masks serve you more efficiency and organized work by reducing the file size.
- Here you can work with one image and multiple tasks. So there is no hassle to keep multiple versions of images.
- Such a mask provides the utmost control over every haziness and edge.
Recommended Reading: Difference between clipping mask and layer mask


3. Alpha Masking
Alpha masking can be regarded as soft masking. This mask helps in separating the picture elements like hair, fur, or smoke with the finest precision.
How to create alpha masking?
There are different ways to create alpha masking. However, following some simple steps, you can easily do this masking.
Advantages and limitations of alpha masking
Alpha channel masking serves both advantages and limitations. However, the most recommended advantage of the alpha mask is that it can separate the elements from the picture in very soft and detailed outlines. But one of the redeeming limitations is, it decreases the picture quality.


4. Refine Edge Photoshop
The Refine Edge tool in Photoshop is used to polish the edges in photographs. Edges having complexity like hair, feathers, blemishes, or branches are smoothed out through this. Mainly you can mask the background through it.
What is Refine Edge Photoshop?
The Refine edge brush tool in Photoshop is the tool that refines the complex object and masks the background. If you are trying to adjust a picture in a different background to make it real, you need this tool. It clears the gray edges and gives your pictures refined edges.
How to refine edge in Photoshop?
To refine edge Photoshop, you need to carefully focus on details to achieve a natural look. Radius, feather, smoothness, and contrast should be kept in mind while refining.
Common Mistakes to Avoid When Using Refine Edge
- While using Photoshop Refine edges, zoom in the picture instead of zoom out.
- Don’t cut off the edges too much. It’ll make the picture look unrealistic.

5. Transparent Object Masking
Transparent object masking is known as a clipping mask. Through this, you can apply a mask to multiple layers. It is considered to be one of the best techniques in Photoshop.
What is transparent object masking
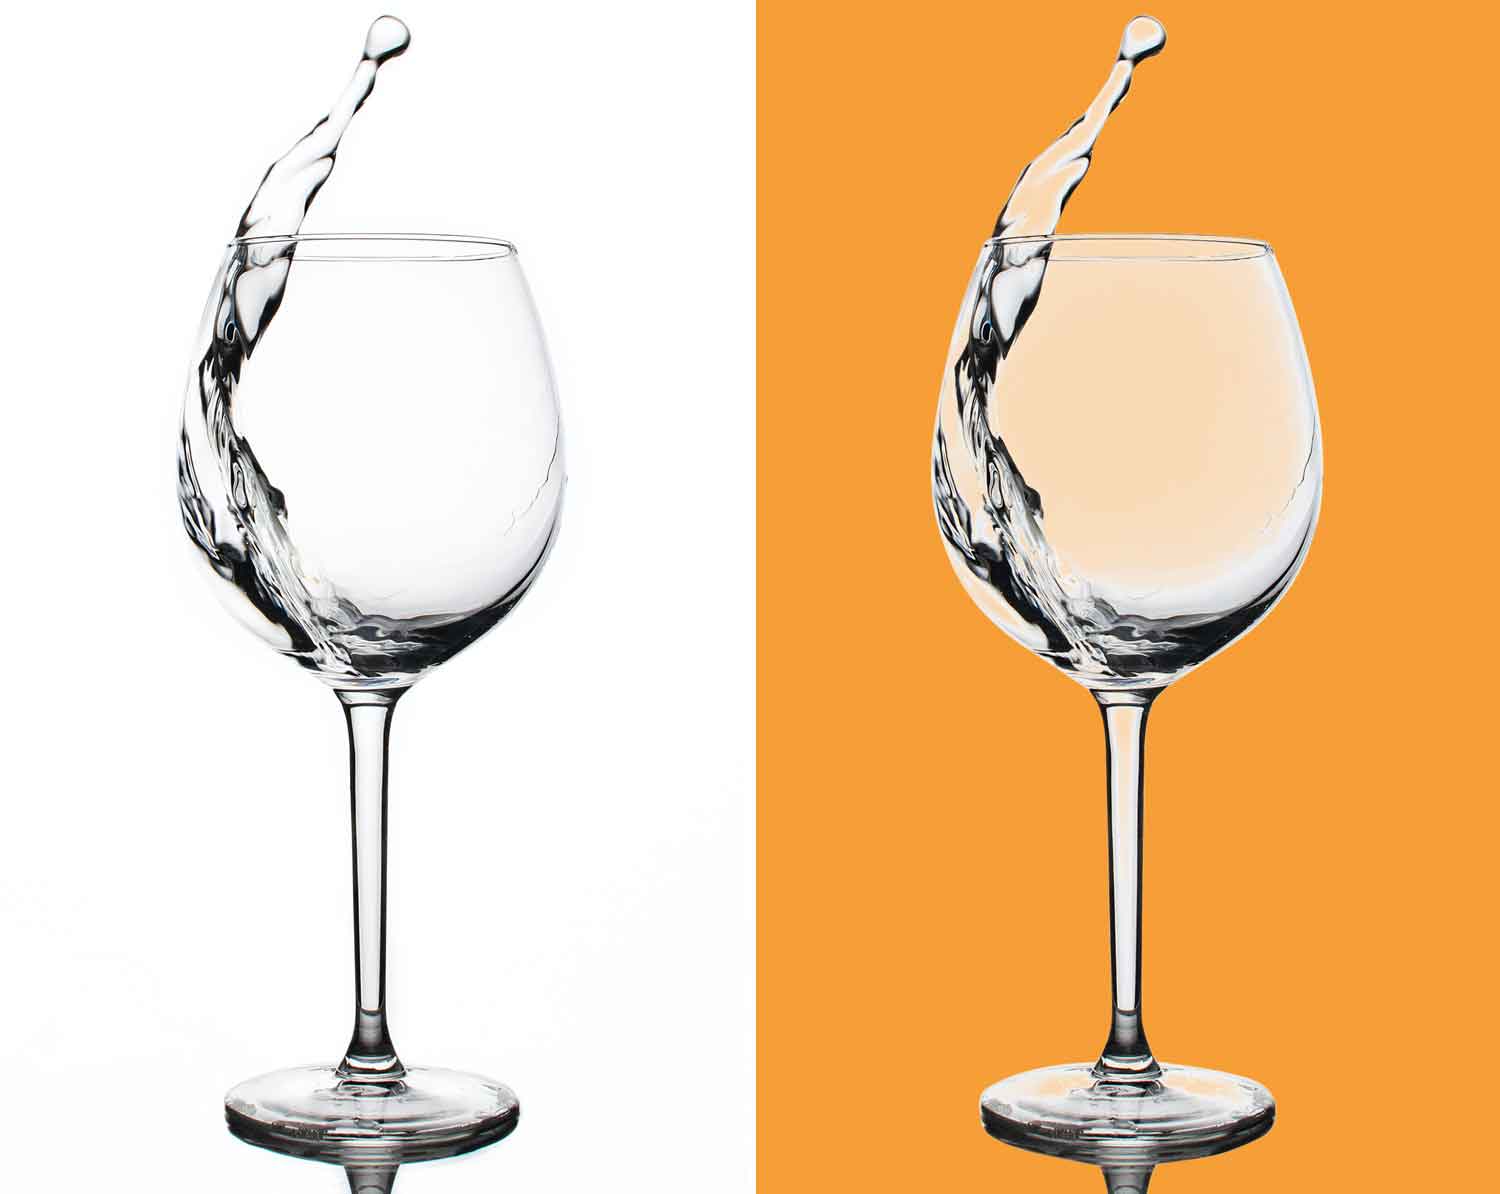
Transparent object masking is a Photoshop tool that is used to separate transparent objects in a picture. You can also use it for semi-transparent objects and image masking.
How to do transparent object masking
To do transparent masking, you need to patiently select the boundaries of the object. You can modify the transparent object of the picture through it.
Where to use transparent object masking
Transparent object masking is mainly used in graphics design. Since it focuses on details, you can use it in commercial product editing for picture masking too.

6. Translucent Object Masking
You can filter out the translucent objects of a picture from its original background through translucent object masking. It increases the quality of the picture.
What is Translucent Object Masking
“Translucent masks” mean “transparent masking.” Through this tool, translucent objects can be separated from their native backgrounds.
How to create translucent objects masking
A translucent mask is created by shadow selection, adjusting opacity, and other necessary elements. You can apply this tool on ice, pieces of jewelry, ceramics, highlights, and whatnot. You can mostly use it to remove stray pixels from photographs to give them a professional appearance.
Benefits of Translucent Objects Masking
- You can remove redundant objects from the picture through translucent masking.
- Specific elements of the picture can be highlighted through the
- Edited pictures get a professional touch.

7. Color Masking
Color masking helps you to adjust the colors of certain parts of your pictures. You can choose your desired part and make necessary changes with colors through color masking.
Definition and purpose of color masking
The tool that is used to fix or alter the chosen colors in a picture is called color masking. The purpose of color masking is to give all sorts of adjustments with color according to your theme and wish.
Techniques for precise color masking
You have to choose the appropriate tools for color masking. The recommended tools are color range selection, quick selection tool, and layer mask. However, don’t make unnecessary changes in colors for a good output.
It’s a great tool for hair color masks. You can color hair, mask every strand of hair in different colors, and make your hair mask color look real by this.
Benefits of using color masking
- Adjusting the color of a specific portion of the picture is possible.
- Makes the picture visually pleasing.
- You can get rid of unnecessary colors and alter them with complementary ones.
- Focus on the main subject matter.

8. Vector Mask
Vector mask is one of the most powerful tools of Photoshop. You can hide or expose any content of a picture by using shapes or ways through vector mask Photoshop.
What is a vector mask in Photoshop?
Vector mask in Photoshop is a resolution-independent editing tool. Masking vector helps to clip out the chosen contents of the layers.
How to create vector mask in Photoshop
Vector mask is the alternative to pixel-based tools. It can be created through shape tools or pens. You can create an independent and resolute path by clipping out the elements of the layers in a picture through a vector mask.
Benefits of Using Vector Masks
- Photoshop Vector mask gives well-polished and clean edges.
- Complex composition can be created through it.
- The quality of the picture is retained after editing.

9. Gradient mask
The first choice of landscape photographers is the gradient mask. Yes, that’s because it helps to smoothen out the filters. Thus, the edited picture looks real.
What is Gradient Mask in Photoshop?
The tool that is used for adding gradual blend in the states of photos is called Gradient Mask Photoshop. A perfect blend is made between the modified stage and the original state through this. You can control the intensity of the picture with it.
How to apply gradient mask in Photoshop?
You can apply the gradient masking like a layer mask. It will create ramping transparency. Besides, adjustment layers can be given a luminary look through this. By applying a gradient mask tool available in Photoshop, you can control the directional changes of your picture.
Advantages of gradient mask
- Photoshop gradient mask creates amazing transitions between two or more photos.
- It blends two states of a picture.
- Gradient masking Photoshop is extremely useful to photographers.

Which Software is used for Photoshop Masking?
You can use a number of software for photo masking. You can consider a variety of options here. Among them, Adobe Photoshop, Illustrator, and Lightroom give noteworthy photo masking services in this case!
Adobe Photoshop
You can choose Adobe Photoshop if the main purpose of your project largely depends on photo editing, retouching, and adding effects. It gives you advanced tools such as layouts, making backgrounds disappear, photoshop masking service or simply altering an image to modify it to your liking.
Adobe Illustrator
If the main purpose of the project is to prepare vector objects from scratch, you can use it. It can be used to prepare any type of logo, graphic image, or icon by just understanding how to use a few tools. This gives one of the best masking services.
Adobe Lightroom
It highly works in terms of giving masking service. You can work on color grading, photo effects, adjusting exposure, or simply using a preset that is already set by the software itself.
Why Do You Need a Photoshop mask?
The importance of Photoshop masking is immense in the case of editing. Keep reading to know why you need a Photoshop mask!
Alters Portion of the image
You can resize your picture. Altering the size of elements in a picture can be done as well.
Hides or makes visible any Portion
If you want to hide a specific part in your picture, you can do it with a Photoshop mask. Similarly, if you want to highlight a certain portion, you can do it too.
Non Destructive process
When a Photoshop mask is applied, your picture quality remains intact. It doesn’t destroy your picture, rather amplifies the quality!
Removes background
If you have an undesirable background in your picture, you can easily remove it. It will increase the beauty of the picture.
Replaces Background
It may happen that you do not like the background of your picture. In this case, you can give your picture a completely new background.
Transparent Background
You can blur out the whole background of your picture. A transparent background will highlight the subject matter.
Different Editing Options of Images
Through Photoshop masking, you can give a new and distinct touch to your picture. You can add new filters and transform them as a whole.
Collage Image
You can add multiple pictures together. Thus, one single picture is created by collaging a few pictures!
Separates the Image into Layers
You can separate various parts of images and adjust them into layers. Eventually, this will make your pictures look sorted out and concise.
Improves Image Quality
You can convert pictures of low quality to high quality. This is a quick process done through Photoshop masking.
Pop up the subject
If you want to highlight the main subject of the picture, it is possible to do it with Photoshop masking.
Blending Multiple Images
When you want to blend multiple pictures and turn them into one picture, Photoshop masking can help you out. Blending makes the picture look real.
Defines an image in a shape
You can adjust an image into a particular shape. Fitting any picture into any shape can be quickly done.
Hides or removes any Portion
Sometimes, you may need to hide or remove any portion from your picture. You can do it through it.
Final Words
This covers the basics of all necessary Photoshop masking. In the case of such Photoshop masking, the deeper you dive, the better result you get. There are plenty of sources available to learn using these. You just need to utilize those strategically. And if you wish to have Photoshop masking, you may contact us!
Hopefully, this guide on Photoshop masking has helped you!


Recent Comments