Photoshop Layer Mask Tips And Tricks – Did You Check Them Today?
Adobe Photoshop, commonly known as Photoshop, is a leading software or tool to edit photos. Using this tool, it has become easier to bring massive change in overall photography. Also, it is a way to explore creativity and showcase your inner thoughts through images.
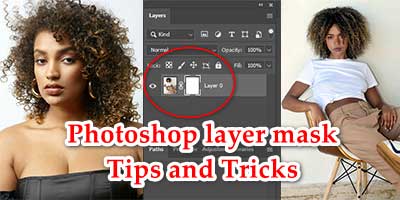
Photoshop Layer Mask is a widely used adjustment tool in this software that allows users to hide or reveal a certain portion in the image.
However, regarding the Layer mask, most of the people-especially who are beginners-are unaware of certain special facts. This post will help them know some exciting facts. And exercising those in real-life will be helpful, indeed.
Let’s start the exploration, now.
Photoshop layer mask tips and tricks?
Do you know why people use layer mask photoshop? The key reason is the benefits in editing images.
The photoshop layer mask allows the users to edit or alter the images without damaging the key source. It means the source of the image will remain intact, but you will get the edit.
The layers and masks allow flexibility in controlling visibility of any specific element in the image.
Start with black and white layer mask in photoshop
In the layer menu, you will find several tools. The black and which layer masks are used to control the pixels’ visibility either by hiding or revealing.
Using the add layer mask Photoshop within an image, you can fine-tune the contrast visibility. Also, this technique allows you to isolate any object using this controlling method.

Adjust the opacity of the layer mask
The adjustment of the opacity layer mask in photoshop is simple. To adjust it, first, click on the layer and move to the Properties panel. There, you will get several options, including the Opacity slider.
Now, adjust the slider per your needs. It will allow you to control the transparency of the entire layer mask.

Where is the layers panel in photoshop?
Finding the layers panel for the beginners is a bit troublesome if that is not activated. However, not to worry.
The layers panel is located on the right side of your Photoshop interface. Or you can access it by clicking on the Window menu, and from there the Layers option.
Moreover, if you press F7 on your keyboard, it will toggle the panel. This is the shortcut key to accessing this tool.

How to combine 2 images in photoshop?
It is the process of blending and layering if you want to combine two images using the Combine layer photoshop technique.
For this combination, you need to open the images, first. Now, select the move tool from your tools. You can also use V for this purpose.


Moreover, you need to adjust the opacity. The adjustment will render a subtle effect on the image. And you can also transform the image using Ctrl and T together. It will help you resize the image or set a better alignment.


How to use a layer mask to hide part of a layer in photoshop?
The photoshop layer mask helps to hide a portion of an image in Photoshop. The process is pretty simple. You need to do it using the masking layer. First, select the layer you want to hide or mask. Next, click on the Add Layer Mask option. From the mask thumbnail, select the Brush tool and set the color (black).

How to move layer mask in photoshop?
The photoshop masks allow to perform various attractive edits in this editing software. Even you can move the Layer mask in Photoshop. For moving a Layer mask, select and mask photoshop could be used. First, select the layer mask. You can select it by clicking on the mask thumbnail. Next, activate the Move tool by pressing V. And then click and drag the mask for repositioning. The mask will move, and you can adjust it as per your requirements.

How to turn any selection into a layer mask?
The photoshop masks smartly allows users to turn any selection into a layer mask. This is a pretty simple process.
Using the mask layer photoshop, you can do this by the following method. First, select using Lasso or Marquee and activate it. Next, click on the Add Layer Mask icon. It is on the bottom of the screen. It will link your selection into a Layer mask in the active layer.However, you can make necessary adjustments using the Brush tool or by Refining Mask.

How to delete a layer in photoshop?
If you want to delete layer in Photoshop, it is an effortless process. In fact, it is a matter of a few mouse clicks.
The masking tool photoshop allows you to modify the existing layer, including the deletion of the layer, as well. To delete layer mask photoshop, simply drag the layer to the trash bin. It will be deleted.


How to invert layer mask in photoshop?
The invert mask photoshop helps to reset the visibility of a layer in the image. This is the process to reverse the visibility of a layer mask. So, photoshop invert mask plays an important role here to make elements visible or disappear.
Step:- If you want to apply invert layer mask, launch Photoshop on your computer. Now, select the layer mask and go to the Layers panel. From there, click on the Image menu and select the Adjustments option.
To have the invert layer photoshop, you have to select the Invert option. Alternatively, you can press Ctrl and I buttons together.

How to View Layer Mask in Photoshop?
If you want to view layer mask on your computer while running photoshop, you need to follow the method explained here. First, ensure you select the masking images in photoshop. Now, press the Alt button and click on the mask thumbnail. It will show you the layer mask. However, if you want to get the normal view, repeat the same. Hold the Alt +Ctrl+R button and click on the mask thumbnail.

How to disable layer mask in photoshop?
The layer masking in Photoshop hides or reveals any portion of the image. So, you can disable or enable the mask.
So, if you want to disable the layer mask, select mask photoshop first. Press shift and then click on the mask thumbnail. It will toggle the layer mask visibility.
The masking in photoshop will be disabled temporarily and you can see the original image content.

How to enable layer mask in photoshop?
Enabling a layer mask is not a big deal in Photoshop. People require it to restore the adjustments on any layer by this mask.
So, to enable a masking layer, go to the Layers panel. Check the mask thumbnail. If it is inactive, the icon will be empty. Click on the empty square to activate it.


How do I copy a layer mask to another layer in Photoshop?
If you want to copy layer, the process is pretty simple in Photoshop. First, you need to select the layer that you want to copy.
Now, you have to use the duplicate layer technique. You can do it by clicking on the layer mask thumbnail. Select the Duplicate Layer Mask option from the menu.
It will copy the mask image photoshop into another layer.

How do you unlink a layer mask?
A photoshop mask layer helps to hide or reveal elements in a photo canvas. But if you want, you can unlink the layer mask, as well.
The process is almost similar to masking a layer in photoshop. Select a layer where there is a mask and right click on the mask thumbnail. You will get several options. Select the Unlink Mask and Layer option.
Alternatively, you can unlink it from the Layer menu. A similar option is there to unlink the layer.
Once unlinked, the layer will work like an independent entity.

How do you relink a layer mask in Photoshop?
Using the mask tool photoshop, you can relink a layer mask. The process is almost effortless.
First, launch Photoshop and open a file. Now, if you have a smart object, double click on the object layer. It will open the layer.
This time, check the Links panel of the mask layer to find the missing link. Then, make a right click on the missing link file. Select Relink to File. Show the location where you want to link and select the file.
Lastly, click on the Place option and then OK. Save and close the smart object file.

How to change layer mask density?
Adjustment the density of layer masks is easy. You need to select the layer mask by clicking on the Layer panel of your window.
Find the ps layer mask thumbnail and right click for Mask Options. In the dialogue box, you will find Density slider. The slider controls the opacity of the mask.
As a result, you can fine-tune your layer based on your needs.

Create Layer Mask from Transparency?
Creating a Layer Mask from Transparency is effortless. You need to launch Photoshop on your device. Now, open an image in Photoshop and check if the image comes with transparency (or the transparency is selected).
Next, go to the Layer menu and then select Layer Mask. And then select From Transparency. It will create a layer mask which is based on the transparency of the selected layers.

How do I add multiple masks to one layer in Photoshop?
You can add multiple layer in Photoshop. For an intricate adjustment of the layer, you can apply this technique.
First, you need to select a layer (single) where you want to add masks. Using the photoshop masking tool, click on Add Layer Mask option. It is on the bottom of the Layer panel.
Now, Press the Alt button and clikc on the Add Layer Mask again. It will add the second mask layer. And you have to repeat the same process to add as many masks as you need.

How to edit layer mask in photoshop?
It is not a rocket science to edit layer mask. Following an easy hack, you can edit the layer mask in Photoshop.
To edit layer mask photoshop, first you need to select the Layer mask thumbnail. You will find it in the Layers panel. Now, select the Brush tool. Set your Foreground color. You can set it to white.

Alternatively, you can set a black Foreground. And click and drag the image to hide the layer areas. Also, you can apply the Brush tool for further adjustment (like size, opacity or hardness adjustment).

Delete layer mask photoshop?
Oftentimes, you may need to delete layer in Photoshop. The process is easier than you think.
To delete layer, select the mask from the Layers panel and check the thumbnail (if it is highlighted). Press the Delete button from your keyboard. The layer will be deleted.
Alternatively, you can right click on the thumbnail of the mask and select the Delete Layer Mask option.
Moreover, you can click on the layer mask and drag it to the trash icon. The icon is located on the bottom of the Layer panel.

Photoshop how to merge layers?
You can merge layer in Photoshop for a better editing and output. And the merging process is easier, as well.
First, you need to select Photoshop multiple layer for the merging process. Press Shift button and click on the layers from the Layers panel.
Now, press Ctrl and E buttons together. It will merge the layers.

So, it was all about Photoshop layer mask tips and tricks. Hope you have enjoyed reading the post.
However, if you feel any queries or would like to supplement the post, use the comment section. Place your thoughts and ideas. We will incorporate it within this post to make it enriched.
Further Reading:
How to make a clipping mask in photoshop – Simple and Fast Approach
Difference between clipping mask and layer mask
Case Study: High-Quality Hair Masking Service

Shahidul Islam
Founder & Managing Director at Clipping Photo Experts
Helping photographers, brands, and ecommerce businesses create stunning visuals through professional photo editing, image masking, retouching, and post-production services. Passionate about sharing practical Photoshop and photography insights based on real-world experience.