How to remove shadows in Lightroom – Real-estate Image
Often real-estate photographers struggle over clicking the best shot. Because the image subjects and objects are mostly wispy or shadowy. Though a shadow can be lovely, it can cause distraction, as well. And you may miss your masterpiece shot.
Fortunately, removing shadows from photos has become much easier. Using various online tools and applications, smoothly, you can remove the shadows.
Explore this section of this step-by-step guide. Here, you will have a comprehensive and in-depth know-how on how to remove shadows in photos using Lightroom.
Removing shadows from the real-estate photo is often essential to raise the level of beauty and professional outlook.
So, let’s start the tutorial.
What is the benefit of shadow removal in real estate images?
The real estate is a competitive arena. Every day, numbers of striking images are being uploaded to websites to enchant intended audiences. However, some of them come with dark shadow pics. And you know what, they are unable to cater the needs of the clients.
In fact, if you do not remove unwanted shadows from the real estate photos, they may not get the right amount of attention. Instead of creating a visual impression, the images will provide a dissatisfactory performance.
Remember, the audiences or the intended clients check the photos first. Next they decide to pay a visit to your property or what so ever. Hence, shadow removal is highly important to hold their attention and influence their decision making process.
The key benefits to erase shadows in pictures are mentioned in brief here.
Do you want to remove shadows from your fashion photography? Check out our guide on how to remove shadows from a face in Photoshop.
1. Impressive visual:- First of all, the shadow removed photos are the sources of impressive visual. Without the shadows, the properties wear a more professional outlook. The properties look catchy and can change the game in a second.
2. Portrays natural beauty:- No doubt that shadow eraser plays a lead role here. Through the process, the properties or real estate objects get a more natural look. Think of a blurry shadow of your property that blocks the natural view. Alternatively, a shiny and bright photo could be more natural to look at.
3. Consistency:- Another important factor is consistency of the lights and looks. When there are shadows, the lights may get compromised. Hence, the brightness of the rooms or spaces inside the property may not bloom perfectly. On the contrary, the shadow removal makes you free from such consistency issues.
4. Top-notch photos:- Besides, when you remove shadows from your real estate photography, they look more professional and appealing. When you want to enlist your property, they will get more preference as the images will be striking, smooth and appealing. Don’t you want that?
5. Property details:- At the same time, the shadow removal can portray the details of your properties. The shadows can conceal the details of the property like its actual color or pattern. If the authentic color is not reflected in the photos, a potential client or buyer may lose the appeal.
6. A professional outlook:- Moreover, real estate photos without shadows look far professional than those with shadows. Without the shadows in the property, they get a polished look. And when you want to list or upload the photo on any listing sites, they become perfectly balanced in all terms. And ultimately, it takes you to the next level.
Method 1:- Slider adjustment

Balance Highlights:- Lower the Highlights to balance with the brightened shadows.
Adjust Exposure:- Increase the Exposure slightly to further brighten the photo.
Fine-Tune Contrast, Blacks, and Clarity:- Since the shadows are now brighter, adjust the Contrast, Blacks, and Clarity to enhance details and reduce any remaining shadows.
Review Adjustments:- After making these adjustments, the shadows should be brightened, revealing more detail in the darker areas.

Method 2: Using Local Adjustment Tool or Brush Tool
Brush Over Shadows:- Use the Brush Tool to paint over the shadowed areas, avoiding the highlighted sections.
Correct Mistakes:- If you accidentally brush over highlighted areas, use Undo or Erase to correct it.
Blend Shadows:- Adjust the light or highlighted areas to blend them seamlessly with the shadowed sections.

Curious to see how a professional retoucher can remove shadows from your real estate images? Get a free trial and see the difference in removing shadows from your images!
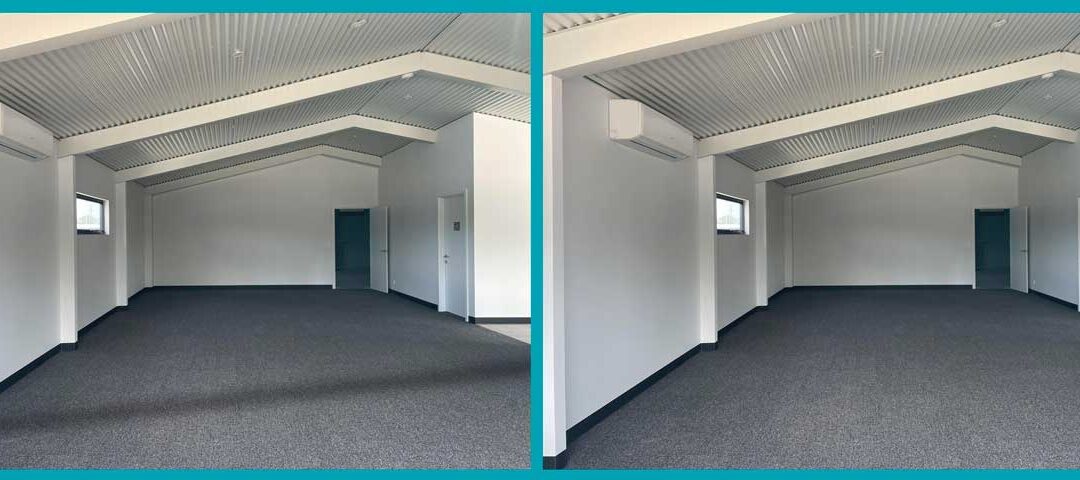
Result:
After these steps, you should see a significant improvement in the detail and brightness of the shadowed areas. Compare the Before and After previews to see the difference.

Conclusion:-
So, now you are an expert in real estate shadow removal, right? This brief guide has already shared the insights. And you can apply the earned knowledge to make the photos look brighter.
However, if you still looking for more perfection, we are there. Write a line to us and we will be there with all our strengths to uphold your real estate photos. Also, you can reach us for any further queries or placing orders for your next real estate photography editing projects.


Recent Comments