How to remove shadows from pictures Using Patch Tools
Why shadows are important in an image?
The answer is pretty simple- they bring life in the images by adding depth and dimension. However, they also could add unwanted distractions to damage the photo. But knowing when and how to remove shadow from photo can get some brighter and professional-looking images.
In this guide, you will get a thorough road map on the process to remove shadow across different platform including Adobe Photoshop, Lightroom, or other online tools.
This step-by-step guide will help you be equipped with the knowledge to make your images more balanced, appealing, and free from distracting shadows. Regardless of using any specific software or tool, you can master the skill.
Let’s start the journey.
What is a shadow in Photos?
The picture of shadows is the dark area or silhouette. It is created when an object blocks the light. In photography, shadows appear just as they do in real life. Surprisingly, photographers have the advantage of manipulating them to enhance visuals.
In the e-commerce world, shadows are creatively used to create illusions or make images appear more realistic, adding depth and dimension to products.
However, while shadows can enhance images, unwanted shadows can be distracting so that is when one needs to remove shadow from the image to maintain a clean presentation. Proper use of shadows is crucial for creating stunning and professional images.

Types of shadow in photos
There are many types of shadows in real life. but it is quite the opposite when it comes to photos or photography. In photography, they mostly fall into three categories.
They are:
- Natural shadow
- Drop shadow
- Shadow reflection
Natural Shadow Keep Orginal Shadow
Natural shadows provide a realistic appearance. It makes the photo subject look more professional and appealing. They make the photo subject look like a real-life object by portraying the necessary features including depth and dimension. And those features assist in grabbing attention from the audience end.
So, when you are planning to add natural shadows on your image, you can get professional help from a marketplace like Upwork. The professional image editors will solve the shadow problems.
However, this tutorial can watch your back if you are reluctant to hire any external professional. Go through the step-by-step section below and remove the shadow from your photo.
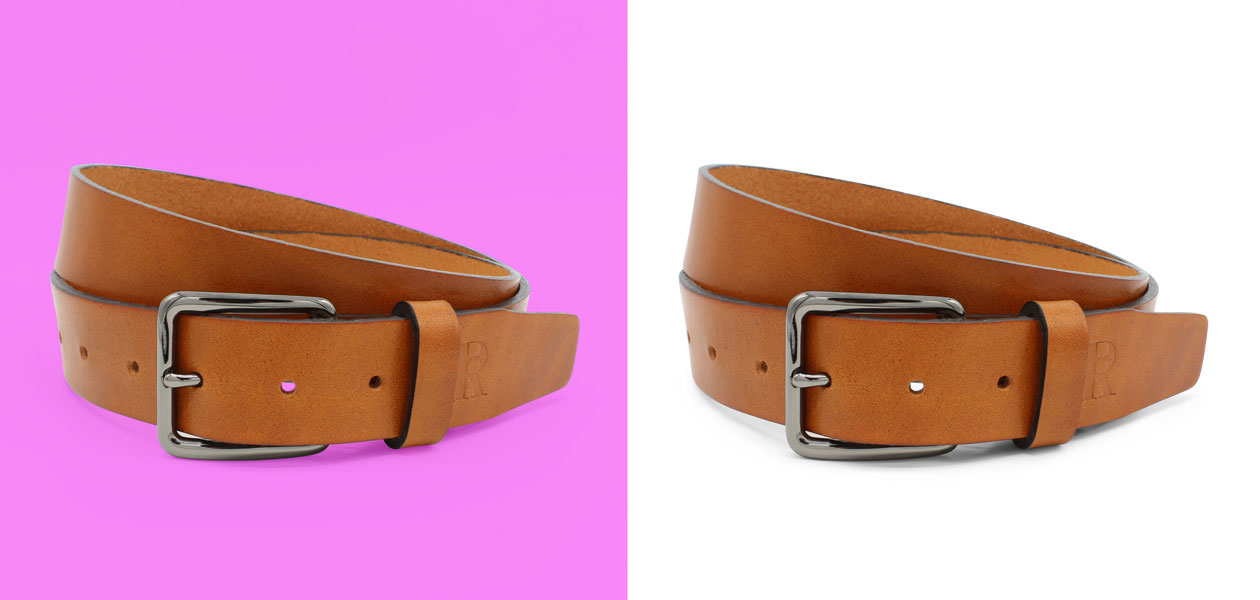
Drop Shadow
A drop shadow is a shadow placed just below the subject, commonly used in product photography. This subtle shadow helps to give you a reference to the surface and also make it more realistic. Drop shadows prevent the subject from appearing as if it is floating.
So, for your specific needs, you can hire a professional Team. But if you want to do it yourself, you need this step-by-step guide. Following the steps, you will have a comprehensive and smart idea about the process.

Shadow reflection
A reflection shadow is created on a shiny surface, often to produce visual effects. This type of shadow mirrors the subject, preserving its color and design. Reflections can be both natural and artificial and can also be created on liquid surfaces.
To enhance the image beauty through shadow reflection, get professional support from marketplace professionals. Alternatively, check out this guide to do it all by yourself. You will know about the entire process in a short time.

Why Remove the shadow in the Photo?
Removing shadows in photos can be essential for several reasons, particularly in professional and commercial photography. Some of them are:
Clarity:- Images with shadows can sometimes obscure details of the subject, making it difficult for viewers to see important features clearly. Removing shadows ensures that all aspects of the subject are visible and prominent.
Professional Appearance:- In product photography, especially for e-commerce, a clean and well-lit image is important. Shadow pictures can create a cluttered or unprofessional look. Removing them helps to present the product in the best possible light, enhancing its appeal to potential customers.
Consistent Lighting:- Inconsistent lighting and shadows can detract from the overall quality of a photo. Removing shadows helps gain a uniform lighting setup, making the image more aesthetically pleasing.
Distraction Reduction:- Photos shadows can sometimes distract from the main subject, drawing attention away from where it should be. By eliminating unnecessary shadows, the subject remains the focal point, ensuring viewers’ attention is directed appropriately.
Brief note: In Adobe Photoshop, you can learn techniques to remove shadow or selectively lighten shadows. Here, you have to apply the Clone Stamp and Healing Brush tools. They will rectify the image seamlessly. Also, you should employ layer adjustments for further precision.
On the other part, Lightroom offers non-destructive methods for shadow removal. You also need to adjust highlights. It will enable you to enhance the image keeping the original quality unhurt or intact.
How to remove shadows in Photoshop – Using Patch Tool?
No time to read? Watch this video to learn how to remove unwanted product shadows using the patch tool.
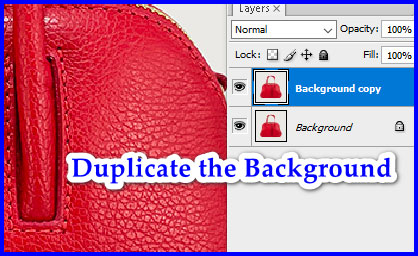
Step -1 : Open photo. Duplicate the Background
First, select a shadow photo and open it in Photoshop. Right click on the background layer. Now, you should select the Duplicate Layer option. Alternatively, you can apply the shortcut Ctrl + J. It will create a copy of your background layer. And you can now edit the photo but the original image will remain unchanged.
Step -2 : Patch Tool selection
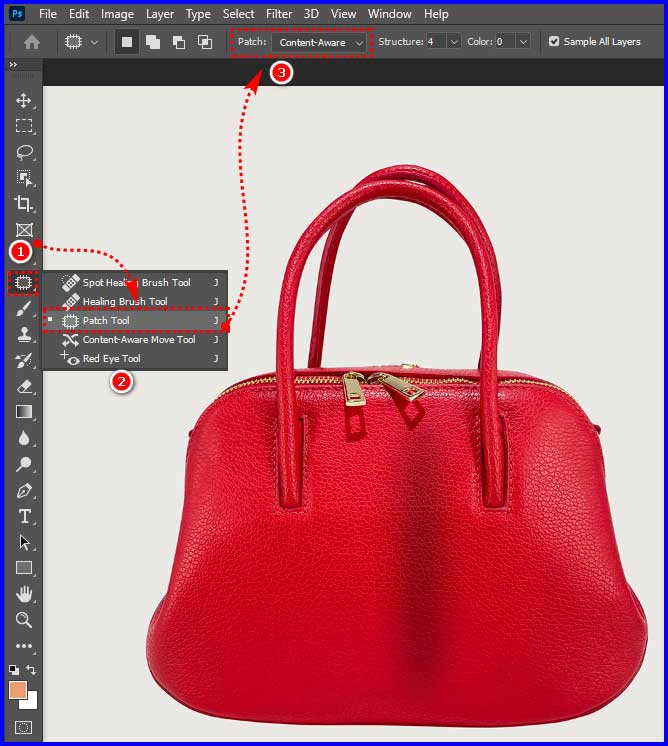
From the toolbar on the left, select the patch tool. From the options bar dropdown menu, located at the top, select Content-Aware. This setting helps Photoshop create new pixels to make smooth transitions.
Step -3 : Shadow removal
Make a Selection:- Select the photoshop shadow you want to remove.

Drag: Drag the selection you made to an area that looks similar. While dragging, you can see the selected area change. When you are satisfied with the selected area, you need to release the mouse button. Photoshop will smoothen the transition.

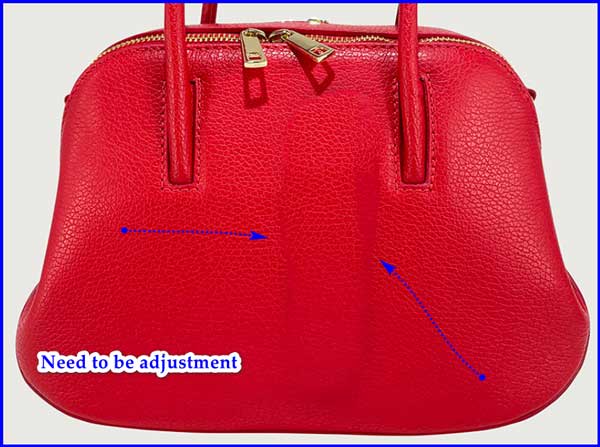
Adjustment: If the result of photo shadow is not what you want, make some adjustment. You can do it from the Structure and Color options. They are in the Patch toolbar.
Structure: It will define how closely Photoshop should match the shapes.
Color: It will define how much color blending you want.
Step -4 : Clean Up
You might need to clean up the photo shadow patch, especially if there are repeating patterns that draw attention. In this phase, you need to apply the Clone Stamp. Alternatively, you can move for the Healing Brush. The cleaning will add details in your work.
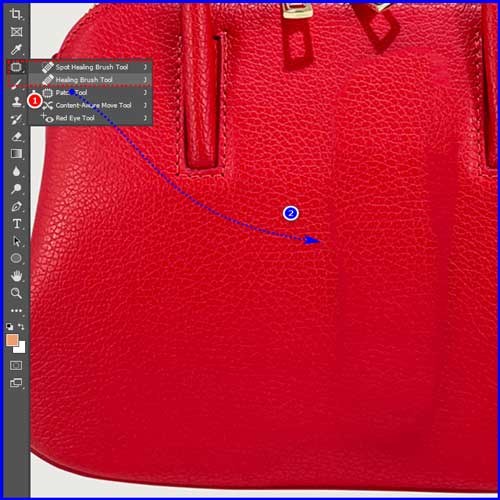
Step -5 : Final Output

Last words:-
So, now you know how to remove shadow from photo using Photoshop. The removal also enhances the overall photo beauty and sends the right messages to the audiences.
To remove shadow, you can go for any of the platforms. The steps mentioned above in this post will help you be an expert. However, if you are facing any issues, you can ask us for our support.
Our dedicated service providers will get back to you with the right solution. Moreover, if you need any professional photoshop shadow service, we are there. Drop a line at our inbox. We will get back to you as faster as possible.
Also, You can add shadow effects to your product using Adobe Photoshop.


Recent Comments