How to get rid of shadows in photoshop – Using Content-Aware Fill?
Shadows can make or break a photo. So, you need to remain aware of the shadows while capturing them. But if you are unable to handle the shadows, using content aware fill for shadow removal could be a great option.
This is one of the leading ways to remove shadows from photos. The process helps to copy a portion from the image surface, and then merges it with any selected area. In the end, the image editor can remove the shadow(s) seamlessly from the photo.
Due to its simplicity and ease of use, photoshop content aware fill is gaining popularity among the professional image editors.
Check this brief guide out to know more on how to remove shadows using content aware fill. The steps below will enhance your skills and sharpness.
What is content aware fill?
Content aware fill photoshop is a tool in Adobe Photoshop. The tool, content aware fill, offers you to remove unwanted shadows smoothly from images. In order to get that seamless image you are desiring, you have to follow some steps in the process. The steps given below will help you get some serious insights about the process.
SIDENOTE: There are various types of shadows. If you’d like to learn more, you can check it out here.
Step 1:- Background duplicating
You have to start by opening the photo in Photoshop that you want to edit.
Open Layers panel and right-click on the background layer.
Although you can just select the Duplicate Layer option, there is an alternative as well. Press (Ctrl+J) to create the duplicate layer, it will help you to make a backup of the original image.
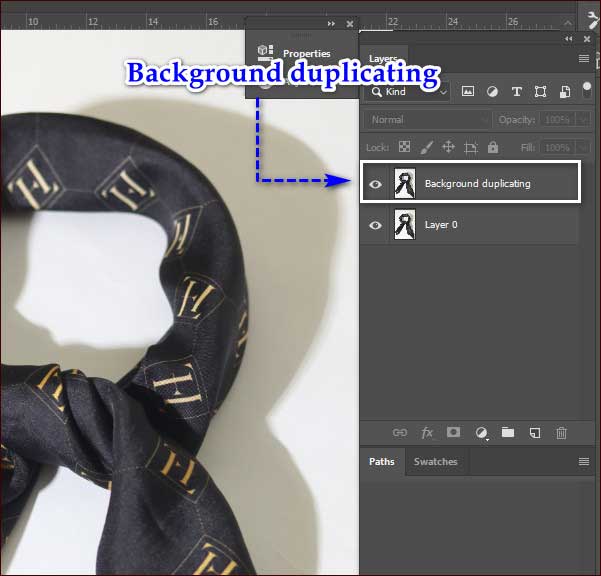
Step 2:- Select the Shadow Area
In the next step, open the toolbar on your left and select the Lasso Tool. Another way is, simply press the L key.
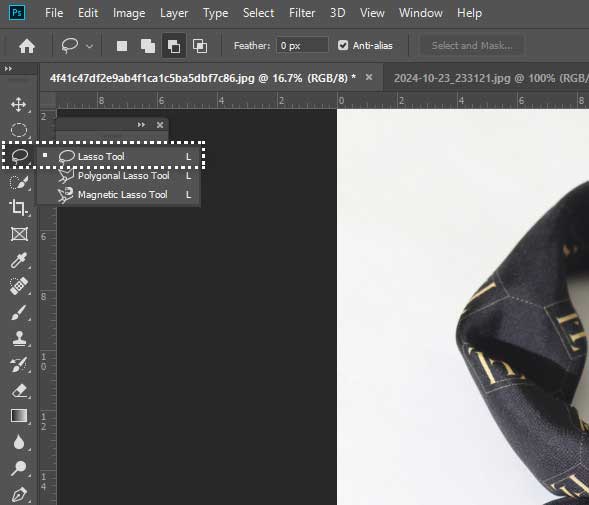
Now, roughly select the shadow you want to remove. A hidden tip is, you may include a little of the surrounding area so it can help you in smooth blending.

Step 3:- The Content-Aware Fill Workspace
Once you are done selecting the shadowed area, keep it selected and find the edit option. Look for Content-Aware Fill there and click on it.
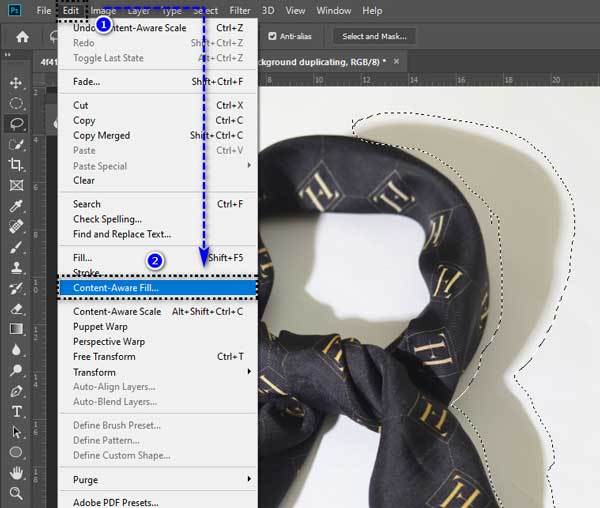
It will activate the Content-Aware fill workspace and Photoshop will do a fill for the selected area depending on the surrounding pixels on its own.
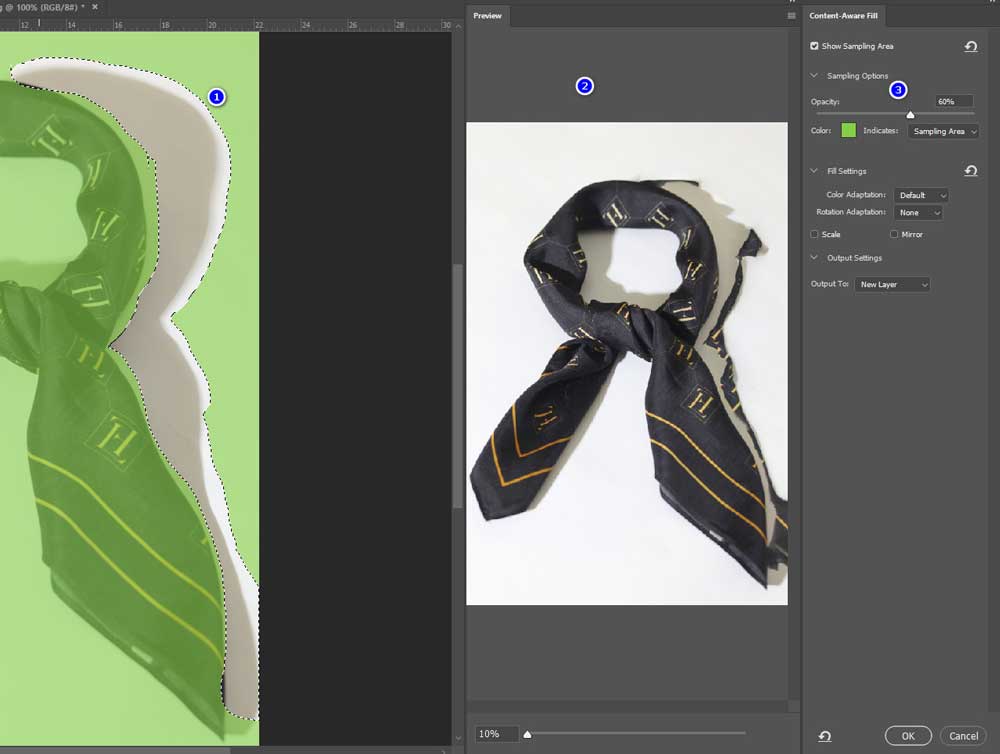
Step 4:- Adjustment
In the workspace, the Sampling Brush Tool will be activated already. The tool mostly remains active by default option and is used for refining. It is time to refine the area that needs refinement. Simply paint on the areas you want to consider in the sampling or get rid of it. You will see a green overlay on the screen which specifies the sampling area.
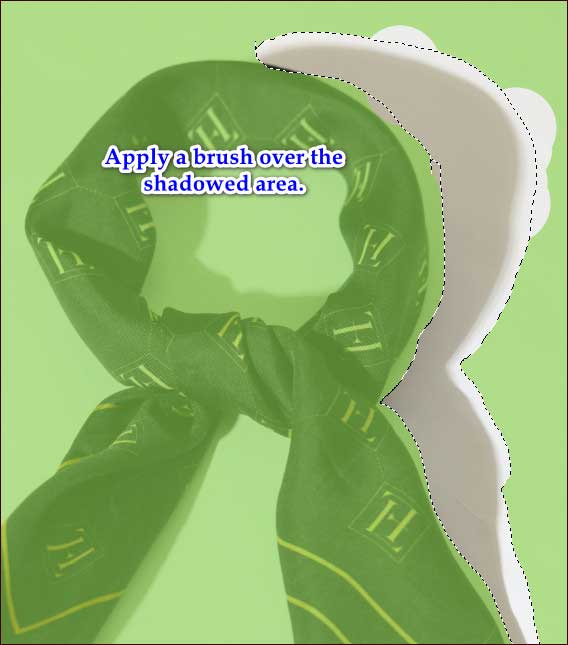
Step 5:- Review, further adjustment
On the ride side of the workspace, you will see the fill settings. The settings ensures you adjust these steps below:
Color Adaptation: This option ensures to blend in a better manner with the colors surrounded.
Rotation Adaptation: It adjusts the position of the fill to match the surrounding figures.
Scale: Scale modifies the size of the fill to match the surrounding textures.
Now, inspect the preview of the fill in the main window.
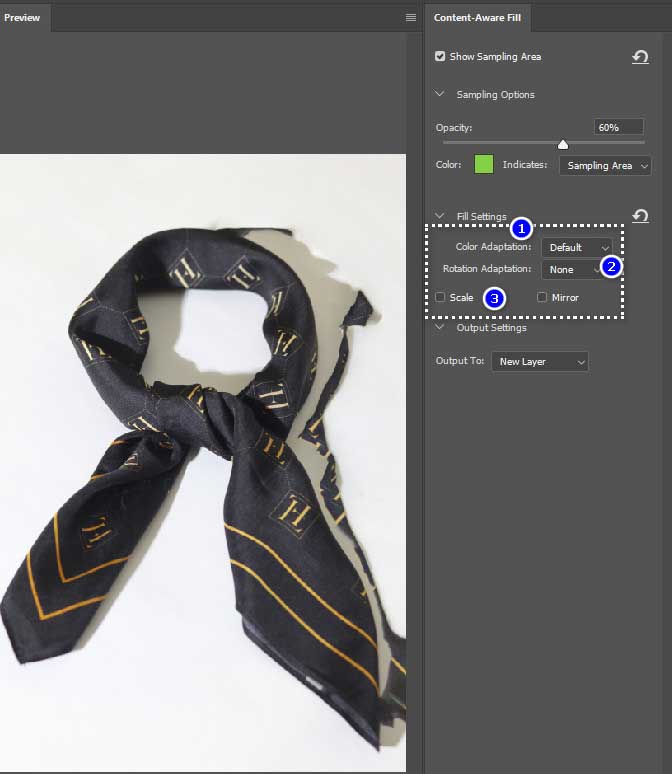
Step 6:- Apply Content-Aware Fill
When you are done with the editing, and you are satisfied with the result, click OK. It will put on the photoshop content aware fill and Photoshop will remove the shadows by blending it flawlessly with the surrounding area.
Step 7:- Final touch
Congratulations, you are almost done. You can apply the Clone Stamp or the Healing Brush if necessary. It removes any shadows in the face even more naturally.

Conclusion:-
Now, you know how to use content aware fill. Undoubtedly, this powerful tool in Adobe Photoshop helps you efficiently remove unwanted objects or shadows from images to make it look more professional.
Another amazing factor about the photoshop content aware fill is, it can not only remove shadows but also can fill in missing parts of an image. Learning this process will save you a lot of time and help you in the long run.
However, if you are unable to perform the image editing, feel free to share with us. We will deliver a professional service for you to raise the visual enhancement of your photos
Recommended Reading:


Recent Comments