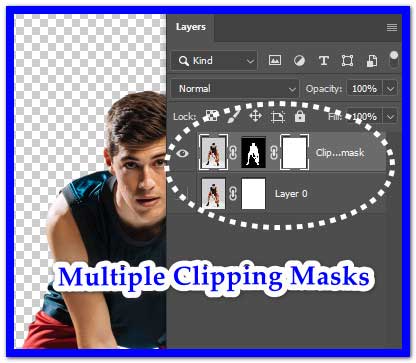
- Nested Clipping Masks: Apply a clipping mask within another mask to control intricate details or create complex compositions.
- Non-Destructive Editing: Use clipping masks to maintain the original layers’ integrity while applying adjustments or effects.
- Gradient Clipping: Apply gradients to clipped layers for seamless blending and dynamic effects.
- Clipping Paths: Utilize vector paths as clipping masks to achieve precise shapes and intricate designs.
- Masking Adjustment Layers: Apply adjustment layers as clipping masks to selectively modify specific areas of your artwork.
These tips and tricks can empower designers to create clipping mask, enhancing creativity and efficiency.
Recommended Reading:
How to make a clipping mask in photoshop – Simple and Fast Approach
How do clipping masks work in Photoshop?
The concept of clipping masks is rather simple. A clipping mask uses the content and transparency of one layer to dictate the visibility of another. Essentially, it involves creating a void in the layer above, allowing the layer below to show through in that specific shape.
Here is a basic breakdown of how it can operate:
Case Study: High-Quality Hair Masking Service
- Clipping Mask Layer relationship:- A Clipping Mask is established between two layers, with the bottom layer acting as the “mask” for the layer directly above it.
- Transparency control:- Transparent sections in the bottom layer conceal matching areas of the layer above, while opaque areas reveal the layer above them.
- Pixel visibility:- In the mask layer, a white pixel results in full visibility of the corresponding pixel in the clipped layer. Conversely, a black pixel completely hides the corresponding pixel. Gray tones in the mask determine varying levels of transparency for the clipped layer.
- Hide parts and object:- Firstly, generate the object intended as the mask, also known as the clipping path.
Note: Only vector objects can serve as clipping paths. And then, arrange the clipping path above the objects to be masked in the stacking order.
Now, select both the clipping path and the objects you wish to mask. Lastly, navigate to object > clipping mask > make.
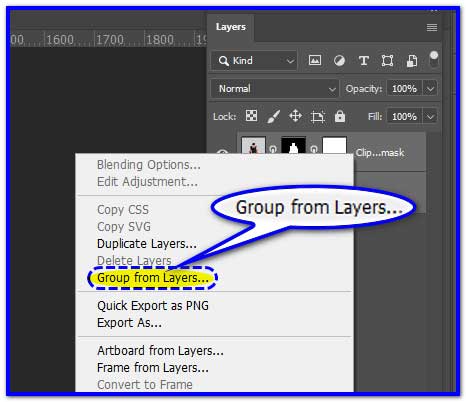
You can begin by grouping the objects to style a clipping path from overlapping areas of two or more objects
Where Can a Clipping Mask Be Applied?
The versatility of Clipping Masks in Photoshop spans across various applications, each offering distinct creative possibilities. Let us explore a few examples:
- Text effects:- One dominant use of clipping masks involves filling text with intricate imagery or patterns. By applying a clipping mask, a landscape photograph, for instance, can seamlessly fill the contours of a title, resulting in captivating text suitable for posters or web designs.

2. Composite Image:- In the realm of photo editing and digital artistry, clipping masks serve as vital tools for seamlessly blending multiple images or introducing textures to specific regions within an image. This capability allows for the creation of visually arresting compositions with nuanced layering.

Further Reading:-
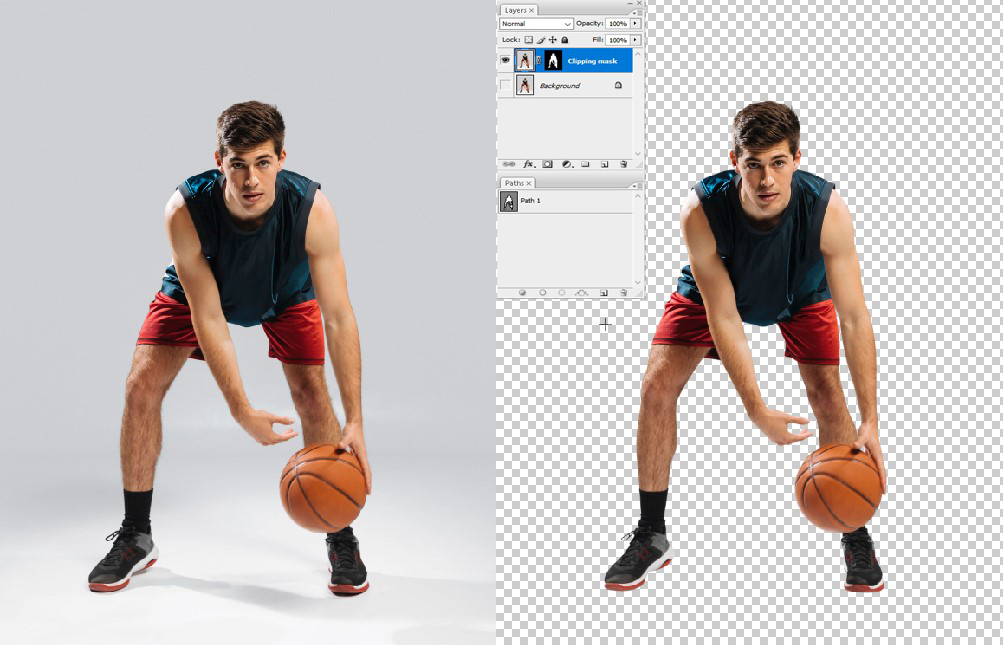
5. Model Background Remove:- To do a Background remove using a clipping mask, you have to duplicate the image layer, create a clipping mask on the duplicate, add a new layer beneath, fill it with a contrasting color, edit the clipped layer to remove the background using tools like the Eraser or selection tools, refine edges as needed, then save the image. This technique retains the original image intact while allowing precise background removal.

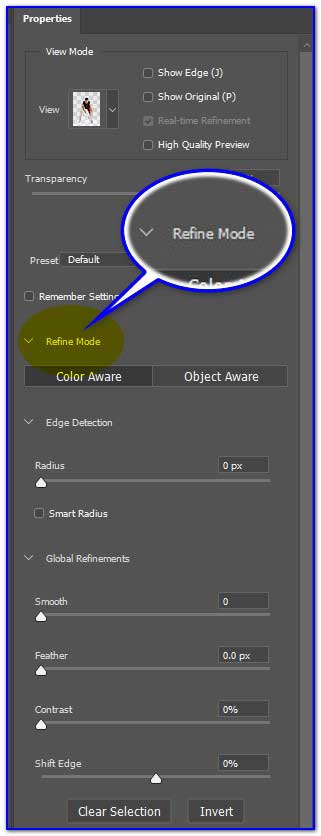
6. Fur and Hair Masking:- For fur and hair Photoshop masking using a clipping mask, you have to make another image layer, and create a clipping mask on it. Then, add a new layer below and fill it with a contrasting color. Finally edit the clipped layer to carefully preserve fur and hair details using tools like the Brush or Refine Edge tool, refine edges as needed, then save the image.

Advanced Clipping mask technique:-
In our exploration of Clipping Masks in Photoshop, we have uncovered advanced techniques to enhance your skills and creativity:
Final Worlds:-
Finally, mastering these advanced techniques will help you unlock new avenues for expression and creativity in your Photoshop workflow. No matter if you are refining details, applying complex effects, or crafting intricate compositions, clipping masks has your back.
It offers a useful toolset to bring your imagination and vision to life with perfectness and finesse. Ultimately, it enhances your photo editing activities and adds more value. Explore, experiment, and push the boundaries of your creativity with Clipping Masks as your guide.


Recent Comments